Preparing your home for winter in Lake Tahoe takes more than just stocking firewood—it means making sure your siding can handle snow, ice, and freezing temperatures. Without proper preparation, even the best siding can crack, warp, or let moisture seep in. That’s why winterizing your siding in Lake Tahoe is essential for protecting your investment and keeping your home energy-efficient. In this guide, we’ll walk through step-by-step siding maintenance tips, explain common winter problems, and show you how professional siding contractors in Truckee and Tahoe can help.
Why Winterizing Siding Matters in Lake Tahoe’s Harsh Climate
In the Sierra Nevada, winter isn’t just a season; it’s an endurance test for your home’s exterior. Siding acts as the primary shield against relentless snowfall, powerful winds, and damaging freeze-thaw cycles. When siding is compromised, it can lead to significant problems, including structural rot, mold growth, and sky-high energy bills.
Properly winterizing your siding in Lake Tahoe is a crucial preventative measure that safeguards your property’s value and integrity. By taking a few proactive steps before the first heavy snow, you can identify and address vulnerabilities, ensuring your home remains warm, dry, and protected throughout the coldest months. Think of it as essential seasonal maintenance, just like changing the oil in your car. This guide will provide actionable siding maintenance in Truckee and Tahoe, empowering you to prepare your home for whatever winter throws its way. If you find issues beyond a simple fix, our reliable siding contractors in Tahoe can provide the expert help you need.
Step 1: Inspect Your Siding Before Snowfall
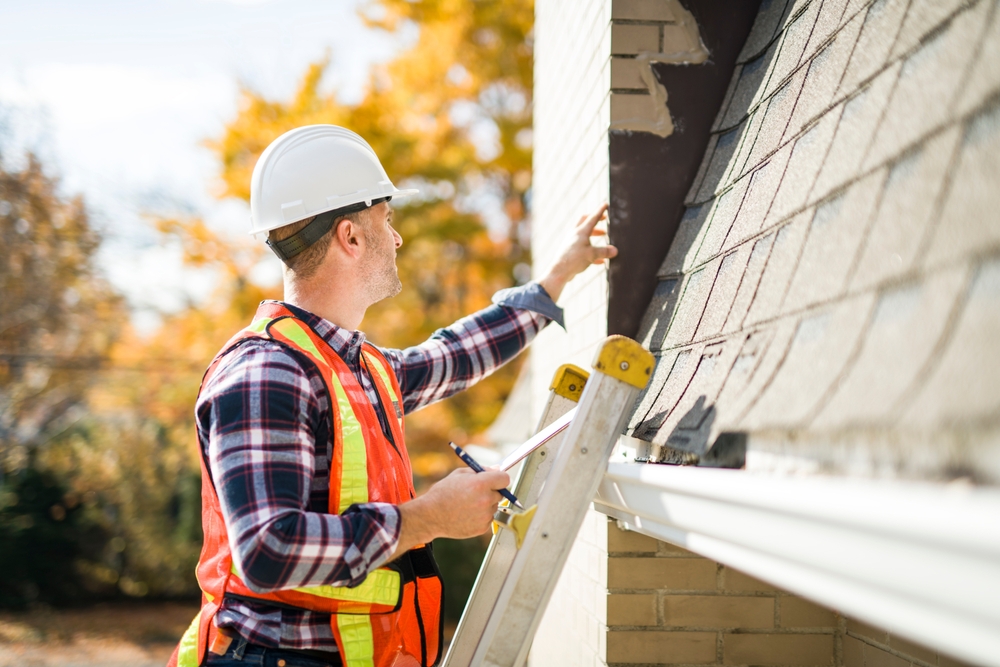
A thorough inspection in the fall is the most important part of winterizing your siding. Catching small problems before they are buried under snow can save you from major headaches later. Grab a notepad, walk around your entire property, and take a close look at every wall from top to bottom.
Look for Cracks, Gaps, and Warping
Examine each siding panel for any signs of physical damage. Look for hairline cracks, chips, or holes, especially in areas prone to impact, like near driveways or walkways. On vinyl siding, check for panels that have become brittle or buckled. On wood siding, look for signs of splitting or warping, particularly on south-facing walls that get a lot of sun. These seemingly minor flaws are entry points for moisture. When water gets into these cracks and freezes, it expands, turning small cracks into large ones.
Check Flashing and Sealant Around Windows & Doors
The joints where your siding meets windows, doors, and corner trim are the most vulnerable spots for water intrusion. Carefully inspect the sealant or caulk in these areas. Is it cracked, peeling, or pulling away from the surface? Over time, sealant degrades due to UV exposure and temperature changes, losing its flexibility and creating gaps. Also, check the metal flashing above windows and doors. This component is designed to direct water away from the opening. Make sure it is secure, free of rust, and not bent or damaged. A failed seal is one of the quickest ways to end up with water damage inside your walls.
Step 2: Clean and Prep Your Siding for Winter
Once your inspection is complete, the next step is to clean your siding. Removing a season’s worth of dirt, pollen, and grime does more than just improve your home’s appearance; it removes organic matter that can trap moisture and lead to mold or mildew growth under the snow.
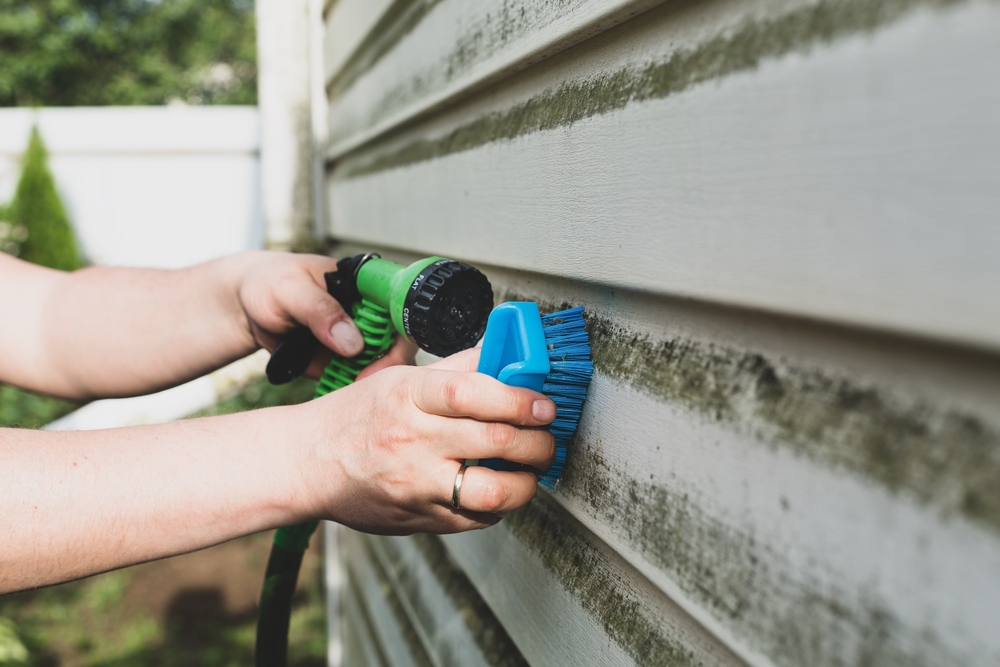
Power Washing and Removing Debris
For most siding types, a gentle cleaning is all that’s needed. You can use a garden hose, a soft-bristled brush, and a simple solution of mild soap and water. For more stubborn dirt, a power washer on a low-pressure setting can be effective, but be careful. Using too much pressure can damage siding, especially wood and older vinyl, or force water behind the panels. Always spray at a downward angle. Pay special attention to areas under eaves or on the north side of your house where grime tends to accumulate. Clear away any leaves, pine needles, or other debris that have collected in corners or against the foundation.
Preventing Mold and Mildew on Siding in Tahoe Homes
The damp conditions of a Tahoe winter are a perfect breeding ground for mold and mildew. During your cleaning, if you spot any dark, discolored patches, it’s important to treat them. A solution of one part bleach to ten parts water can be used to scrub away existing mold. Be sure to rinse the area thoroughly afterward. By starting the winter with a clean slate, you reduce the chances of mold taking hold. For persistent issues, especially on porous surfaces like wood, you may need a specialized siding cleaner.
Step 3: Seal, Caulk, and Protect Against Moisture
With your siding inspected and cleaned, it’s time to seal up any vulnerabilities you found. This is where you actively fortify your home against ice and water, creating a truly weatherproof barrier.
Why Proper Sealing Prevents Ice Damage
As mentioned, the freeze-thaw cycle is siding’s worst enemy. When melting snow seeps into gaps and refreezes, it can pry siding apart, break seals, and even damage the structure of your home. This phenomenon, known as ice damming when it occurs on roofs, can also happen on a smaller scale anywhere on your walls. By diligently sealing every crack and gap, you eliminate the entry points for water, stopping this destructive process before it can start.
Best Sealants for Fiber Cement and Wood Siding in Tahoe
The type of sealant you use matters. For fiber cement siding in Tahoe, a high-quality, paintable elastomeric or polyurethane caulk is an excellent choice. These sealants remain flexible in cold temperatures, so they won’t crack as the building materials expand and contract. For wood siding in Tahoe, it’s crucial to use a sealant that adheres well to wood and can be painted or stained to match. Again, a flexible, exterior-grade polyurethane caulk is a reliable option. For small cracks in wood panels, a wood filler or epoxy can be used before sealing and painting.
Step 4: Insulation and Energy Efficiency Upgrades
Winterizing your siding isn’t just about keeping moisture out; it’s also about keeping heat in. A properly insulated wall system can dramatically reduce your energy bills and make your home more comfortable.
Adding House Wraps and Weather Barriers
If you’re considering a full siding replacement, it’s the perfect opportunity to upgrade your home’s insulation. A modern house wrap, or weather-resistive barrier (WRB), is a crucial component. Installed between your home’s sheathing and the siding, a WRB serves two functions: it acts as a secondary barrier against any moisture that gets past the siding, and it prevents air from moving through the wall cavity. This drastically reduces drafts and heat loss.
Energy-Efficient Siding Options for Lake Tahoe Homes
Some siding materials offer better insulation than others. Insulated vinyl siding, which has a layer of rigid foam insulation bonded to the back of each panel, can increase your wall’s overall R-value. Fiber cement and wood are also natural insulators. When combined with a proper house wrap and continuous exterior insulation, these siding options create a highly energy-efficient envelope for your home, which is a smart investment in a place with long, cold winters.
Step 5: Schedule Professional Maintenance Before Heavy Snow
While many winterizing tasks are DIY-friendly, some issues require an expert eye. Knowing when to call for professional help is key to properly protecting your home.
When to Call Siding Contractors in Lake Tahoe
If your inspection reveals widespread damage—such as numerous cracked panels, extensive rot, or siding that is pulling away from the walls—it’s time to call in the professionals. Siding contractors in Lake Tahoe have the tools and expertise to assess the extent of the damage and determine the best course of action. They can identify underlying issues, like hidden moisture damage, that might not be visible to the untrained eye. Getting a professional opinion before winter is much better than discovering a major problem in the middle of a snowstorm.
Signs Your Home May Need Siding Replacement, Not Just Prep
Sometimes, seasonal prep isn’t enough. If your siding is old and requires constant repairs, or if you’re facing high energy bills despite your efforts, it might be time for a full replacement. Other signs include siding that has faded significantly, become chalky to the touch, or is bubbling and blistering. These are indicators that the material itself is failing. A replacement is a significant investment, but it solves the root problems rather than just patching them temporarily.
Common Winter Siding Problems in Tahoe Homes
Even with preparation, the harsh Tahoe winter can still cause problems. Being aware of these common issues can help you spot them early.
Ice Dams and Water Intrusion
Ice dams on the roof can cause water to back up and run down behind your siding. Keep an eye on the area where your roof meets the top of your walls, especially after heavy snow. If you see icicles forming on the siding itself, it could be a sign of a water intrusion problem that needs immediate attention to prevent siding repair in Truckee.
Snow Load and Siding Stress Cracks
Heavy snow leaning against your home for extended periods puts physical stress on the siding panels. This is particularly true for lower-level walls or areas where drifts accumulate. After the snow melts in the spring, make sure to re-inspect these areas for any new cracks or warping that may have occurred due to the pressure. A siding replacement near Lake Tahoe may be necessary if the damage is extensive.
Final Thoughts: Protect Your Tahoe Home with Proper Siding Winterization
Winter in Lake Tahoe doesn’t have to take a toll on your home. With the right siding preparation, you can protect your property, lower energy costs, and avoid costly repairs. At Hexteriors, our team of professional siding installers in Tahoe specializes in helping homeowners winterize and maintain siding built to withstand heavy snow and ice. Whether you need siding repair, replacement, or a full inspection before the season hits, we’ve got you covered. Contact Hexteriors today for a free siding estimate in Truckee or Lake Tahoe and keep your home protected all winter long.
FAQs About Winterizing Siding in Lake Tahoe
1. How often should I winterize my home’s siding in Lake Tahoe?
It’s best to inspect and winterize siding once a year, ideally in the fall before the first snowfall. Regular maintenance ensures your siding can handle Tahoe’s harsh winters.
2. What siding materials perform best in snowy climates like Tahoe?
Fiber cement siding and insulated vinyl siding are the most durable options for snowy climates. Both resist moisture damage, cracking, and warping better than traditional wood.
3. Can siding repairs be done during the winter months in Truckee?
Yes, minor siding repairs can be completed in winter, but larger projects or full siding replacements are best scheduled in spring or fall for optimal installation conditions.
4. How do I know if my siding needs replacement instead of winterization?
Signs include widespread warping, rot, buckling, or persistent leaks despite maintenance. A siding contractor in Tahoe can inspect and recommend repair vs. replacement.
5. Why hire a professional siding contractor instead of DIY winterization?
Professionals ensure proper sealing, flashing, and insulation—key steps that prevent water intrusion and structural damage. DIY attempts often miss critical problem areas.


