There is an undeniable charm to wood siding. Whether it’s the rustic appeal of cedar shingles on a Tahoe cabin, the clean lines of redwood lap siding on a Bay Area bungalow, or the historic character of a Victorian in Sacramento, wood offers a warmth and authenticity that synthetic materials strive to replicate. It connects a home to nature and stands as a testament to traditional craftsmanship.
However, owning a home with wood siding in California comes with a specific set of responsibilities. Unlike vinyl or fiber cement, wood is an organic material. It lives, breathes, and reacts to its environment. In the diverse and often harsh climate of the Golden State—where blistering dry heat can be followed by atmospheric rivers—wood siding is under constant siege.
Many homeowners make the mistake of thinking their siding is a “install it and forget it” component. This misconception can lead to catastrophic damage, ranging from hidden rot that compromises structural integrity to increased vulnerability during wildfire season. The key to preserving the beauty and value of your wood-clad home lies in one simple, proactive habit: the annual inspection.
In this comprehensive guide, we will explore why California’s unique environment makes wood siding vulnerable, what specifically to look for during an inspection, and how regular maintenance can save you tens of thousands of dollars in repairs.
The Unique Vulnerability of Wood in California
To understand why inspections are non-negotiable, we first need to understand the material itself and the environment it lives in. Wood is cellular. It absorbs and releases moisture. When it dries out, it shrinks; when it gets wet, it swells.
California’s climate amplifies these natural cycles to an extreme degree, stressing the material in ways that don’t happen in more temperate regions.
1. The Feast or Famine of Moisture
California weather is defined by extremes. We often go months without a drop of rain, only to be hit by intense storms in the winter.
- Dry Season Shrinkage: During our long, hot summers, wood siding dries out significantly. This causes planks to shrink, potentially opening up gaps at the seams, joints, and corners. Caulk that was once flexible can become brittle and crack under the heat.
- Wet Season Infiltration: When the rains finally return, often accompanied by driving winds, water seeks out every tiny opening created during the dry season. If the paint or stain seal has been compromised by UV rays, the wood acts like a sponge, soaking up water.
2. The relentless UV Assault
The California sun is unforgiving. Ultraviolet (UV) radiation breaks down the lignin in wood cells—the natural glue that holds the fibers together.
- Photo-degradation: Over time, this causes the wood surface to turn gray and erode. More importantly, UV rays destroy the protective coatings (paint and stain) meant to shield the wood. Once this barrier is breached, the wood is defenseless against moisture and pests.
3. The Biological Threat: Pests and Fungi
Our mild winters mean that pests are active for much of the year.
- Termites: Subterranean and drywood termites are a constant threat in California. They are drawn to wood that has been softened by moisture.
- Woodpeckers: These birds often drill into wood siding not just to find insects, but to store acorns (in the case of Acorn Woodpeckers) or to drum for territory. Their holes open direct pathways for water to enter the wall cavity.
- Dry Rot Fungus: This is the silent killer of wood homes. Contrary to its name, “dry rot” requires moisture to germinate. Once established, it can spread through timber even after the water source is gone, turning structural beams into dust.
4. The Fire Factor
Perhaps the most critical reason for maintaining wood siding in California is fire safety. Dried-out, splitting, or rotting wood ignites much faster than healthy, well-maintained wood. In the Wildland-Urban Interface (WUI), compromised siding can provide the fuel an ember needs to engulf a home.
The High Cost of Neglect
Why is an annual inspection so critical? Because with wood siding, problems start small and invisible but grow exponentially.
Imagine a small crack in the caulk around a window frame. It’s barely noticeable from the driveway.
- Year 1: Winter rains drive a small amount of water into that crack. The wood siding swells slightly but dries out in summer.
- Year 2: The swelling and shrinking cycle widens the crack. Now, more water enters. It reaches the building paper behind the siding, which may be old and brittle. Moisture begins to touch the plywood sheathing.
- Year 3: The constant moisture creates a perfect environment for fungi. Dry rot begins to eat away at the sheathing and the structural studs. Termites detect the soft, damp wood and move in.
- Year 4: You notice a small soft spot on the siding or peeling paint. You call a contractor, expecting a minor patch.
- The Reality: The contractor opens the wall to find extensive rot affecting the framing of the house. A $200 caulking repair has turned into a $15,000 structural renovation.
This scenario plays out in California homes every year. It is entirely preventable with an annual inspection. If you suspect you might already be at “Year 4,” don’t panic—but do act quickly. Visit our siding repair page to learn how professional intervention can stop the damage.
The Annual Inspection Checklist: What to Look For
While we always recommend a professional inspection every few years, homeowners should perform their own thorough “walk-around” at least once a year—ideally in the late fall before the heavy rains begin.
Here is a step-by-step guide on what to scrutinize.
1. Visual Inspection from a Distance
Start by standing back from your home. You are looking for big-picture changes.
- Warping or Buckling: Do the lines of the siding look straight? Wavy or buckled boards indicate that the wood is expanding but has nowhere to go, or that moisture has caused swelling.
- Discoloration: Look for dark streaks (which could be mold or mildew) or white powdery stains (efflorescence). Also, note areas where the paint has faded significantly more than others.
- Greenery Encroachment: Are trees or bushes touching the siding? Plants trap moisture against the wood and provide a bridge for insects. They also scratch the protective paint layer.
2. The “Poke and Prodd” Test (Tactile Inspection)
You cannot inspect wood siding just with your eyes; you need to use your hands and a tool (like a screwdriver or an awl).
- Check for Rot: Go to high-risk areas—corners, near the ground, under windows, and under gutters. Gently press your tool against the wood. It should be firm. If the wood feels spongy or if the tool sinks in easily, you have rot.
- Loose Boards: Tap on boards. Do they rattle? Loose siding allows wind-driven rain to get behind the cladding. It can also indicate that the fasteners (nails) have rusted through or pulled out.
3. Examining the Finish (Paint and Stain)
The finish is the shield. If the shield is broken, the warrior falls.
- Peeling, Cracking, or Blistering: These are signs that moisture is already behind the paint, pushing it off the wood.
- Chalking: Run your hand across the siding. If a powdery residue comes off, the paint is breaking down due to UV exposure and losing its protective qualities.
- Alligatoring: If the paint looks like cracked reptilian skin, it has lost its elasticity and can no longer expand and contract with the wood.
4. The Caulking and Seals
Caulk acts as the elastic bridge between dissimilar materials (like wood siding and vinyl windows).
- Cracks and Gaps: Look closely at the caulk lines around windows, doors, and corner trim. If the caulk is cracked, missing, or pulling away from either surface, it is a direct entry point for water.
- Hardness: Press the caulk with your fingernail. It should have some “give.” If it is rock hard, it needs to be removed and replaced.
5. Pest Patrol
Look for the tell-tale signs of unwanted guests.
- Small Holes: Pinholes can indicate powderpost beetles. Larger, perfectly round holes are likely carpenter bees. Messy, irregular holes might be woodpeckers.
- Mud Tubes: Look near the foundation for thin tubes of mud climbing up towards the siding—the highway for subterranean termites.
- Sawdust (Frass): Piles of fine wood dust near the base of the wall are a clear sign of carpenter ants or termites excavating your home.
6. Ground Clearance
Check the bottom edge of the siding.
- The 6-Inch Rule: Wood siding should never touch the ground. There should be a minimum of 6 inches of clearance between the soil/mulch and the bottom of the siding. If the wood touches the earth, it will wick up moisture like a straw and allow termites easy access.
Specific Challenges by Wood Type
Different wood species behave differently. Knowing what you have helps you inspect it better.
Cedar
Cedar is the most common wood siding in California due to its natural resistance to rot and insects. However, it is soft.
- Watch For: Woodpecker damage (they love soft cedar) and “tannin bleed”—reddish-brown stains that occur when moisture pulls natural oils to the surface, staining the paint.
Redwood
Prized for its rich color and durability, redwood is a California classic.
- Watch For: Black staining from mildew (redwood creates a nutrient-rich surface for mold when damp) and splitting. Redwood can be brittle; older boards often split near the nails.
Pine / Spruce
These softwoods are less naturally resistant than cedar or redwood and rely entirely on paint/stain for protection.
- Watch For: Rot. If the paint fails on pine, rot sets in very quickly. Inspect pine siding twice a year.
The Role of Professional Inspections
While a homeowner’s inspection is crucial, it has limitations. You might miss subtle signs that a trained eye would catch immediately. Professional siding contractors or inspectors have the tools and experience to look deeper.
Moisture Meters
Professionals use moisture meters to detect water content inside the wood that you cannot feel with your hand. A reading might show high moisture levels in a wall that looks perfectly dry on the outside, alerting you to a hidden leak (perhaps from a window above or a plumbing pipe) before extensive rot sets in.
Thermal Imaging
In some cases, thermal cameras can be used to identify cold spots in the wall, which often indicate wet insulation caused by a siding leak.
High-Ladder Access
Most homeowners inspect the bottom 6 feet of their home. But damage often happens at the roofline, where gutters overflow or where roof flashing meets the siding. Professionals have the equipment to safely inspect these hard-to-reach, high-risk areas.
If you are unsure about the state of your siding, or if you simply want peace of mind, contacting a specialist is a smart move. At Hexteriors, we specialize in assessing wood siding health. If repairs are needed, or if you are considering transitioning to a lower-maintenance option, you can explore our full range of siding options.
Inspection Findings: Repair or Replace?
So, you’ve done your inspection and found some issues. Now comes the critical decision: do you patch it up, or is it time to move on?
When to Repair
If the damage is localized, repair is the cost-effective and environmentally friendly choice.
- Scenario: You find dry rot on the bottom two boards on the north side of the house.
- Solution: Remove the damaged boards, inspect the paper and sheathing behind them, treat any minor fungal growth, and install new boards.
- Scenario: You find peeling paint and cracked caulk on the south-facing wall.
- Solution: Scrape, sand, prime, repaint, and recaulk. This is standard maintenance.
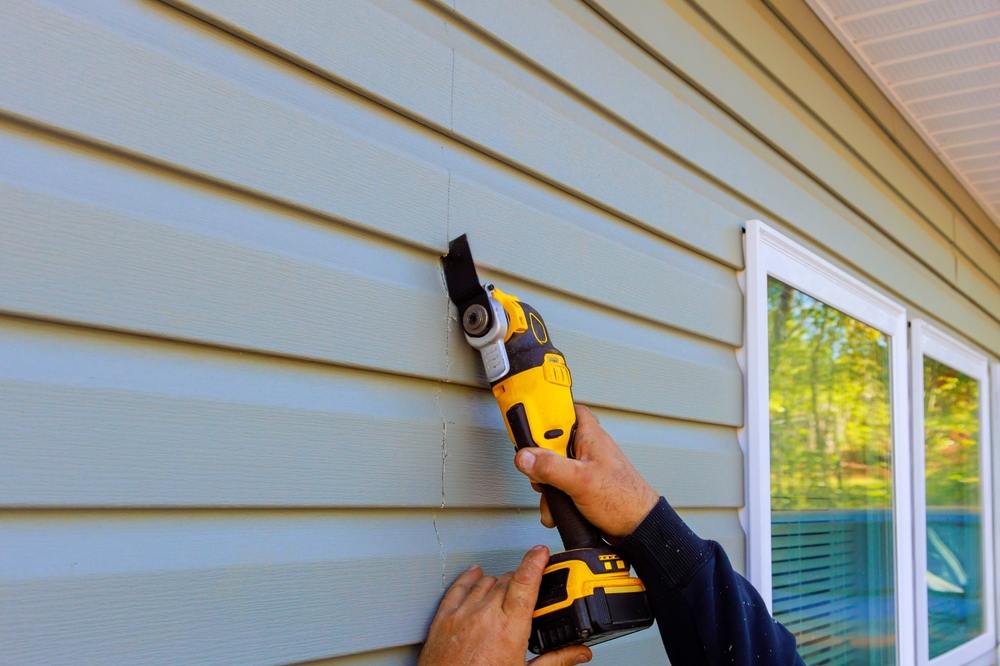
However, proper repair technique is vital. You cannot just slap wood putty over rot. The rot must be surgically removed. For detailed information on how we handle these delicate fixes, check out our siding repair guide.
When to Replace
Sometimes, the inspection reveals that the siding has reached the end of its serviceable life.
- Widespread Rot: If you find soft spots on multiple walls, it suggests a systemic failure of the siding or the moisture barrier.
- Recurring Issues: If you have repaired the same area three times and the paint keeps peeling, there is likely a moisture problem inside the wall that siding repair cannot fix.
- Cost-Benefit Analysis: If the cost to repair, repaint, and treat the wood approaches 50% of the cost of new siding, replacement is usually the smarter financial move.
The Replacement Opportunity
If your annual inspection leads to the conclusion that your wood siding is retiring, it opens up an exciting opportunity. You can choose to reinstall new wood for that classic look, or you can upgrade to modern materials that mimic wood but resist California’s challenges better.
- Fiber Cement: Offers the look of wood but is impervious to termites, rot, and fire.
- Engineered Wood: Treated to resist fungal decay and impact, offering the workability of wood with enhanced durability.
Maintenance: The Follow-Up to Inspection
An inspection is only useful if you act on the findings. Here is a maintenance calendar for California wood siding owners.
Spring:
- Wash the siding with a garden hose and mild detergent to remove dirt and pollen.
- Trim back bushes and trees that grew during the wet season.
- Check for bird nests in vents or eaves.
Summer:
- Monitor for insect activity.
- Touch up paint on areas that may have chipped.
Fall (The Big Inspection):
- Perform the comprehensive 6-point inspection detailed above.
- Clean gutters thoroughly. Clogged gutters are a primary cause of siding rot.
- Re-caulk any split seams before the winter rains.
Conclusion: Stewardship of Your Home
Owning a home with wood siding in California is a bit like owning a vintage car. It requires more attention and care than a modern, computerized vehicle, but the aesthetic reward is often worth the effort.
However, unlike a car stored in a garage, your siding is out in the elements 24/7/365. It shields your family from the storm, the heat, and the cold. It deserves, at the very least, one hour of your time every year to ensure it remains strong.
Annual inspections are not just about finding problems; they are about extending the life of your home. They allow you to catch a $500 problem before it becomes a $15,000 disaster. They ensure that when fire season approaches, your home’s exterior is intact and resistant, not dry and crumbling.
Don’t wait for a leak to appear on your living room ceiling. Take a walk around your home this weekend. Look closely at the wood that protects you. And if you see something that looks suspicious—a soft board, a strange crack, or a patch of mold—don’t hesitate to call in the experts.
Your home is your biggest investment. Protect it with vigilance.
Ready to schedule a professional assessment or discuss repair options? VisitHexteriorstoday.


