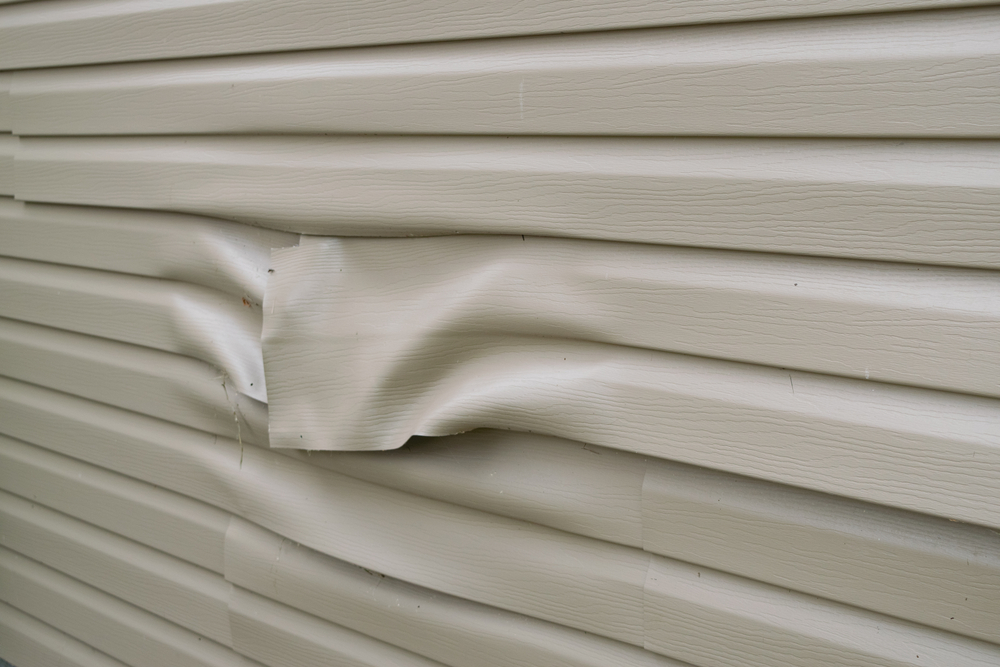
Vinyl siding is one of the most popular exterior cladding materials in the United States, and for good reason. It is durable, cost-effective, and relatively low maintenance. However, “low maintenance” does not mean “invincible.” Over time, even the highest quality vinyl can succumb to the elements. Whether it is a stray baseball, a fallen tree branch during a storm, or simply the brittleness that comes with age and sun exposure, cracked or broken panels are a common headache for homeowners.
A crack in your siding is more than just a cosmetic blemish; it is a chink in your home’s armor. That seemingly insignificant split allows moisture, insects, and wind to penetrate the protective barrier of your home, potentially leading to rot, mold, and structural damage behind the scenes.
While many homeowners might feel intimidated by the prospect of exterior repairs, fixing a single damaged vinyl panel is a manageable project if you have the right tools and patience. In this comprehensive guide, we will walk you through exactly how pros handle vinyl siding repair, from assessing the damage to snapping the final piece into place.
The Importance of Timely Siding Repair
Before we dive into the “how-to,” it is crucial to understand the “why.” Why is it urgent to replace that broken panel now rather than waiting until next season?
Vinyl siding acts as a rain screen. It is designed to shed water away from your home’s structure. It is installed loosely—literally “hung”—to allow for expansion and contraction with temperature changes. This system works beautifully as long as the surface is intact.
When a panel cracks, the water-shedding capability is compromised. Here is what happens when you ignore damage:
- Water Infiltration: Rainwater can seep behind the crack. Once water gets behind the siding, it can become trapped against the house wrap or sheathing. Over time, this moisture leads to wood rot in the sheathing and studs.
- Mold and Mildew: Dark, damp spaces behind siding are breeding grounds for mold. This can eventually impact your indoor air quality.
- Insect Infestation: Cracks are open doors for ants, termites, and wasps looking for a dry place to build a nest.
- Energy Efficiency Loss: While the siding itself isn’t your primary insulation, it protects the insulation layers. compromised siding can lead to wet insulation, which loses its R-value (thermal resistance).
If you are noticing signs of extensive damage or suspect water has already done its worst, it might be time to look into professional siding repair in Sacramento. For isolated cracks, however, a DIY replacement is often sufficient.
Understanding the Anatomy of Vinyl Siding
To repair vinyl effectively, you need to understand how it is put together. Vinyl siding isn’t nailed tightly to the wall like wood clapboard. It uses a specialized system that allows it to float.
- The Nail Hem: This is the top strip of the siding panel with elongated holes. Nails are driven through the center of these slots, leaving a small gap between the nail head and the vinyl to allow movement.
- The Buttlock: This is the bottom edge of the panel that curves underneath.
- The Locking Leg: This is the channel on the top of the panel (just below the nail hem) that receives the buttlock of the panel above it.
When installed correctly, the buttlock of the top panel snaps securely into the locking leg of the bottom panel. This “lock” is what keeps the siding flat against the wall against wind, while the nails simply hold the weight. Understanding this locking mechanism is the key to removing and replacing panels without destroying the surrounding area.
Tools and Materials You Will Need
Professional siding contractors don’t rely on brute force; they rely on leverage and specific tools designed for the trade. Before you head to the hardware store, gather the following:
Essential Tools
- Zip Tool (Siding Removal Tool): This is non-negotiable. It is a small, inexpensive hand tool with a hooked end designed specifically to unzip the locking mechanism between panels. Trying to separate panels with a screwdriver or pry bar will almost certainly damage the vinyl.
- Pry Bar or Claw Hammer: Used for removing the nails holding the damaged panel.
- Tin Snips or Aviator Snips: For cutting the vinyl siding to length.
- Utility Knife: For scoring and snapping vinyl if necessary, or for precision cuts.
- Tape Measure: Accuracy is vital for cutting the replacement panel.
- Carpenter’s Square: To ensure your cuts are perfectly vertical.
- Safety Glasses and Work Gloves: Vinyl edges can be sharp, and old vinyl can shatter.
Materials
- Replacement Vinyl Siding Panel: We will discuss finding a match in the next section.
- Galvanized Roofing Nails: You need nails with large heads that are corrosion-resistant. Ideally, use 1-1/2 inch to 2-inch aluminum or galvanized steel nails.
The Challenge of Matching Siding
By far the hardest part of replace broken siding panels is finding a piece of vinyl that matches your existing exterior. If you are lucky, the previous owner or builder left a box of spare siding in the attic or garage. If not, you have a detective job ahead of you.
Why Is It So Hard to Match?
Vinyl siding fades over time due to UV exposure. Even if you find the exact brand, product line, and color name that was installed ten years ago, a brand-new piece from the factory will likely be darker and more vibrant than your weathered siding.
Strategies for a Perfect Match
- The “Hidden Spot” Swap: This is a pro trick. Remove a piece of siding from a less visible area of your home (like the back of a garage or behind a bush). Use that weathered piece to replace the broken panel on the front of your house. Then, use a new (slightly mismatched) panel to fill the spot in the hidden area.
- Siding Distributors: Take the broken piece to a dedicated siding supply house (not just a big box store). They have access to discontinued lines and can often identify the manufacturer by the profile and weep holes.
- Paint: If you cannot find a color match, focus on matching the profile (the shape and size of the lap). You can then paint the new vinyl panel to match the rest of the house. Modern acrylic latex paints with urethane resins adhere very well to vinyl.
Step-by-Step: How to Remove a Damaged Panel
Once you have your tools and your replacement panel, pick a day with moderate weather. Avoid working with vinyl in freezing temperatures, as the plastic becomes extremely brittle and can shatter under the pressure of a zip tool. Conversely, in extreme heat, vinyl becomes very pliable and difficult to cut cleanly.
Step 1: Unlock the Panel Above
The damaged panel is nailed to the wall at the top, but those nails are covered by the bottom of the panel immediately above it. To access the nails, you must unlock the panel above.
- Insert the curved tip of your zip tool under the bottom edge of the panel above the damaged one.
- Hook the tool onto the locking lip on the back of the siding.
- Pull downward and outward firmly while sliding the tool along the length of the panel. You will feel (and hear) the panel “unzip” or disengage from the lock.
- You may need to hold the upper panel up with your hand or a small wood block to keep it out of the way.
Step 2: Remove the Nails
With the upper panel unzipped and lifted, the nail hem of the damaged panel is now exposed.
- Examine the nails. If they were installed correctly, they shouldn’t be driven tight against the vinyl.
- Use your pry bar or claw hammer to gently pull the nails. Be very careful not to leverage the pry bar against the good siding panel below. If necessary, slide a piece of thin plywood behind your pry bar to protect the siding underneath.
- If the nails are stubborn or rusted, it might be safer to drive them flush into the wall or cut the heads off with a chisel rather than risking damage to the sheathing by prying too hard.
Step 3: Remove the Damaged Panel
With the nails gone, the panel is only held by its bottom lock.
- Push down on the panel to disengage its bottom buttlock from the panel below it.
- Slide the panel out. If the panel extends into corner posts or J-channels around windows, you may need to slide it sideways to free it from the channels.
Pro Tip: Inspect the area behind the removed panel. This is your chance to check the building paper or house wrap. If you see tears in the paper, patch them with house wrap tape. If you see black stains indicating mold or soft wood indicating rot, stop immediately. You may need more extensive siding repair in Sacramento than just a simple swap.
Step-by-Step: Installing the New Panel
Now comes the installation. Precision here ensures the repair lasts and looks seamless.
Step 1: Cut the Replacement Panel
Measure the empty space or the old panel you just removed.
- Transfer the measurement to your new vinyl panel.
- Subtract about 1/4 inch from the total length to allow for expansion. Vinyl expands significantly in the heat; if you cut it to fit tight against the corner posts, it will buckle and warp when summer hits.
- Use your carpenter’s square to mark a straight cut line.
- Cut the panel using tin snips. Avoid closing the jaws of the snips completely at the end of each stroke to prevent crinkling the edge.
Step 2: Position the Panel
- Slide the new panel up into position.
- Ensure the bottom edge (the buttlock) snaps firmly into the locking leg of the panel below it. You should feel a distinct click or engagement.
- Pull up gently on the panel to ensure the lock is engaged, but do not pull so hard that you stretch the profile.
Step 3: Nailing It Home
This is the most critical step for the longevity of the repair.
- Align the nail slots of the new panel with the old nail holes if possible, or start new holes if the old ones are stripped.
- Drive your roofing nails into the center of the nail slots.
- Do not drive the nails tight. Leave about 1/32 to 1/16 of an inch of space between the nail head and the vinyl (about the thickness of a dime). The panel must be able to slide back and forth freely. If you nail it tight, the siding will buckle when the temperature rises.
- Space nails about 16 inches apart, aiming for the studs.
Step 4: Re-lock the Upper Panel
Now you need to secure the panel above, which you unzipped in Step 1.
- Use your zip tool again. Engage the zip tool into the locking edge of the upper panel.
- Pull the locking edge down while pushing the panel in towards the wall to snap it over the lock of your newly installed panel.
- Slide the zip tool along the entire length of the seam, pressing and snapping as you go.
- Run your hand along the seam to ensure it is smooth and fully engaged.
Repairing Small Holes and Cracks Without Replacement
Sometimes, a full panel replacement is overkill. If you have a small hole (from a screw hook, for example) or a minor hairline crack, you can perform a patch repair.
Using Caulk for Hairline Cracks
If the crack is very thin and clean:
- Clean the area with soap and water and let it dry.
- Use a high-quality, paintable exterior caulk (silicone-acrylic blend is often best).
- Apply a small bead into the crack.
- Smooth it with your finger or a putty knife.
- Once dry, touch up with paint if necessary.
The “Cut-and-Cover” Patch Method
For larger holes that don’t warrant removing the whole 12-foot panel:
- Cut a section of replacement siding that is about 4 inches longer than the damaged area.
- Cut off the nail hem (the top strip with holes) of this patch piece. You only want the face and the bottom lock.
- Apply a generous amount of construction adhesive to the back of the patch piece.
- Snap the bottom lock of the patch over the bottom lock of the damaged panel.
- Press the patch firmly against the damaged area. The adhesive will hold it in place.
- This creates a nearly invisible repair if the color match is good, as the patch blends in with the existing laps.
Common DIY Mistakes to Avoid
Even handy homeowners can make mistakes with vinyl because it behaves differently than wood or brick. Avoid these common pitfalls:
- Nailing it tight: We cannot stress this enough. Tight nails prevent movement and cause the “wavy” siding look that ruins curb appeal.
- Ignoring the weather: Installing vinyl on a 100-degree Sacramento summer day can result in loose siding in the winter. Installing on a freezing day leads to buckling in summer. Aim for moderate temperatures.
- Forcing the interlock: If the panels aren’t snapping together easily, something is misaligned. Don’t hammer on the bottom of the panel to force it up; you will crack the lip.
- Caulking the laps: Never caulk the horizontal overlap where two panels meet. These seams are designed to breathe and allow water to weep out. Sealing them traps moisture behind the siding.
When to Call a Professional
While replacing a panel or two is a great weekend project, there are times when DIY is not the best route. You should consider calling a professional for siding installations in Sacramento or major repairs if:
- The damage is widespread: If a hailstorm has peppered one entire side of your house, spot repairs will look patchy and take forever. A full wall replacement might be faster and look better.
- You find rot: If you remove a panel and the wood underneath crumbles, you have a structural issue. Siding pros know how to replace sheathing, flash windows properly, and ensure the rot doesn’t return.
- Asbestos concerns: If your home has very old siding (specifically cement-asbestos shingles, though rare to confuse with vinyl, sometimes old layers exist underneath), disturbing it requires certified abatement.
- Second or third stories: Working on ladders with large, floppy pieces of vinyl is dangerous. Pros have the scaffolding and pump jack systems to work safely at heights.
- Waterproofing complexity: If the damage is around a window, door, or complex roofline, the flashing details are critical. Incorrect flashing is the number one cause of leaks in homes.
Preventative Maintenance for Vinyl Siding
The best repair is the one you never have to make. Extending the life of your vinyl siding is simple:
- Clean it annually: Use a soft-bristle brush and a mild detergent (or a specialized house wash) to remove dirt, pollen, and spiderwebs. Avoid high-pressure power washing, which can force water up behind the panels.
- Keep the grill away: Vinyl melts. Keep BBQs and patio heaters at least 10 feet away from your siding.
- Trim vegetation: Keep bushes and tree limbs trimmed back so they don’t rub against the siding on windy days.
- Inspect regularly: Walk around your home once a season. Look for loose panels, popped nails, or cracks. Catching a loose panel before the next windstorm can save you from finding it in your neighbor’s yard.
Conclusion
Replacing a broken vinyl siding panel is a satisfying repair that restores both the curb appeal and the weatherproofing of your home. With a zip tool in hand and a little patience, you can erase the damage caused by that rogue lawnmower rock or winter storm.
However, your home’s exterior is a complex system. If you uncover issues beneath the siding, or if the project grows beyond a simple repair, don’t hesitate to seek expert help. At Hexteriors, we specialize in ensuring the homes of Sacramento and the Bay Area are beautiful, energy-efficient, and watertight. Whether you need a quick repair or are considering a complete exterior makeover, proper care of your siding is an investment in your home’s future.
For more information on our services or to schedule an estimate, visit our contact page today. Keeping your home protected is our priority.


