When you invest in new siding, you’re not just refreshing your home’s look — you’re protecting it for decades. A quality vinyl siding installation does more than boost curb appeal; it defends against heat, wind, and moisture while improving energy efficiency. For Sacramento homeowners, that means keeping your home comfortable through triple-digit summers and those occasional wet winters.
But not every installation is done the same way. A proper vinyl siding installation process follows careful steps — from prep work and flashing to fastening, sealing, and final inspection. Each stage matters, because even small mistakes can lead to big problems later, like warping, gaps, or trapped moisture. That’s why choosing an experienced siding company makes all the difference.
At Heritage Exteriors, our team takes pride in doing things right the first time. We handle everything in-house — no rushed crews or subcontracted work — ensuring every panel is straight, every joint sealed, and every project completed with precision. Here’s what you can expect when you work with Sacramento’s trusted siding experts.
Why a Proper Vinyl Siding Installation Process Matters
Choosing new siding is exciting, but the long-term success of your project hinges entirely on the quality of the installation. The best materials in the world will fail if they aren’t put on correctly. Understanding the difference between a rushed job and a professional one can save you from major headaches and costly repairs.
How skilled installation affects durability and curb appeal
A skilled installer does more than just hang panels on a wall. They create a complete, integrated system that protects your home. Properly installed siding looks straight, seamless, and beautiful for decades. It resists wind, sheds water effectively, and stands up to Sacramento’s intense heat without warping or buckling. The final fit and finish—the way the trim lines up, the corners meet, and the seams are placed—is what gives your home a polished, high-end look.
The difference between a fast job and a professional one
A fast job often prioritizes speed over quality. The crew might rush through prep work, use a nail gun improperly, or slap on trim without ensuring a proper seal. A professional job, on the other hand, is methodical. A professional installer takes the time to prepare the walls, install flashing correctly, and fasten each panel with precision. At Heritage Exteriors, our family-owned business was founded on this principle of craftsmanship. Our in-house crews focus on getting it right, not just getting it done.
What happens when installers cut corners
Cutting corners is the root cause of most siding failures.
- Skipping House Wrap: This leaves your home’s structure vulnerable to moisture damage and rot.
- Improper Flashing: Leads to leaks around windows and doors, causing hidden water damage inside your walls.
- Nailing Too Tightly: This is the #1 cause of warped, buckled, and wavy siding. The panels can’t expand and contract in the heat, so they deform.
- Ignoring a Level Line: Results in siding that looks crooked and unprofessional.
These mistakes can turn your beautiful new siding into an eyesore that fails to protect your home.
Step 1 — Preparing Your Home for Siding Installation
A great siding job starts long before the first panel is installed. Meticulous preparation is the foundation for a flawless and durable finish.
Site inspection and surface assessment
The first thing a professional contractor should do is a thorough inspection of your existing exterior. This involves checking for any areas of rot, structural damage, or uneven surfaces that need to be addressed. They should also identify the location of all exterior fixtures like lights, hose bibs, and electrical outlets that will need to be worked around.
Removing old siding and checking for rot or damage
Unless your existing siding is in perfect, flat condition (which is rare), a full tear-off is the professional standard. Removing the old siding is critical because it allows the installer to inspect the wall sheathing underneath for any hidden rot or pest damage. This is the only opportunity to find and fix these issues before they are sealed up behind new siding. Any soft spots or damaged wood must be replaced to provide a solid base for the new installation.
How your installer should protect landscaping and property
A respectful crew treats your property as if it were their own. Before any work begins, they should protect your landscaping, walkways, and driveways. This might involve laying down tarps to catch debris and protecting delicate shrubs with lightweight coverings. At Heritage Exteriors, keeping a clean and organized job site is a core part of our commitment to a seamless customer experience.
Step 2 — Weather Barriers and Wall Prep
With the old siding gone and the walls exposed, the next step is to create a robust, waterproof barrier. This is arguably the most critical part of the entire vinyl siding installation process.
Why house wrap and flashing matter for moisture control
Vinyl siding is designed to be a “rainscreen,” not a waterproof barrier. It sheds the vast majority of water, but some moisture can get behind it. This is where the Water-Resistive Barrier (WRB), or house wrap, comes in. This material acts as your home’s last line of defense, preventing water from reaching the wood sheathing.
Proper flashing—the metal strips installed around windows, doors, and roof intersections—is equally important. It directs water away from these vulnerable areas and over the top of the siding.
Pro Tip: Ask your contractor what kind of house wrap and flashing tape they use. A quality installer will use reputable brands and follow a meticulous process of overlapping seams and sealing every penetration to create a continuous, watertight envelope.
Installing insulated underlayment for better energy efficiency
If you want to boost your home’s energy efficiency, this is the time to add a layer of rigid foam insulation. This underlayment is installed over the house wrap and provides a continuous blanket of insulation, reducing thermal bridging through the wall studs. This is a smart upgrade for Sacramento homes, as it helps keep the heat out during our long, hot summers, lowering your cooling costs.
Sacramento climate considerations — heat, dust, and moisture
A contractor experienced in the Sacramento region understands our unique climate. They know that the house wrap needs to be durable enough to withstand intense UV exposure during installation. They also know that all seams must be meticulously taped to keep out the fine dust carried by the Delta breeze and to manage the moisture from our seasonal rains.
Step 3 — Measuring, Cutting, and Panel Layout
This is where craftsmanship and attention to detail begin to show. A well-planned layout ensures the final product looks balanced, clean, and professional.
How precision affects fit and finish
An expert installer takes the time to plan the layout before making the first cut. They will determine the best place to start so that the panels are level and the seams are staggered properly. Precise measurements and clean cuts are essential for ensuring that panels fit snugly into trim pieces and that all lines are straight and true.
Accounting for expansion and contraction in hot weather
Vinyl siding expands in the heat and contracts in the cold. In Sacramento, where temperatures can swing 30 degrees or more in a day, this movement is significant. A professional installer must cut panels slightly shorter than the wall space to leave an expansion gap at each end. Typically, a 1/4-inch gap is needed when installing in moderate temperatures, and up to 3/8-inch on a cold day. Without this gap, the siding will buckle and warp on the first hot afternoon.
Importance of matching patterns, seams, and lines
A good installer will plan the panel layout to ensure that the seams are staggered and not clustered together, which makes them less noticeable. They will also take care to keep the horizontal lines of the siding consistent as they move around the house, so everything lines up perfectly from one corner to the next.
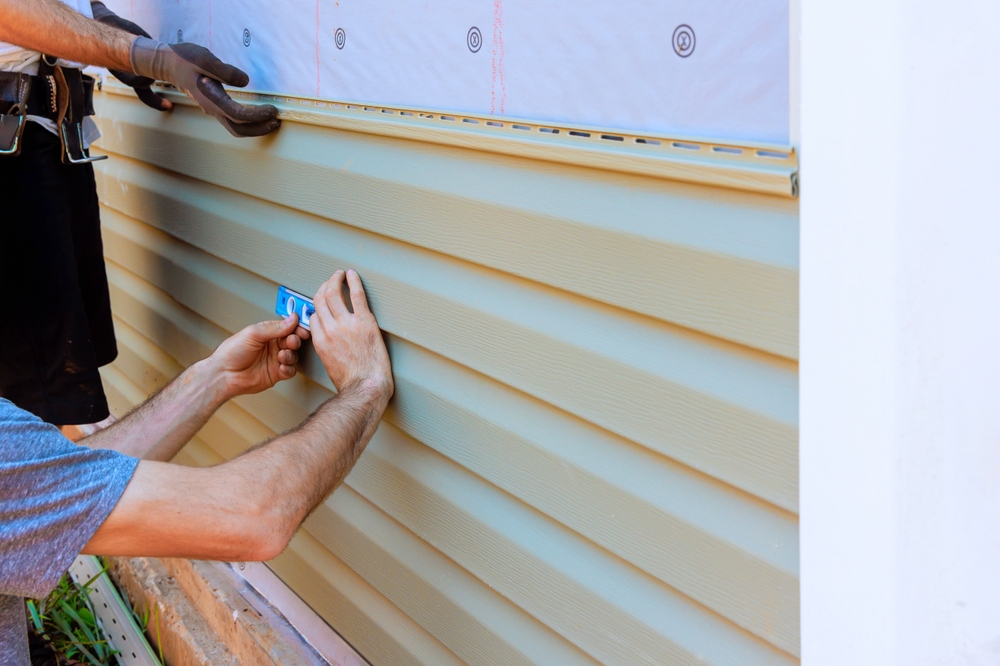
Step 4 — Fastening Vinyl Siding Correctly
How the siding is nailed to the wall is the single most important factor in preventing warping and ensuring longevity.
The right nails, spacing, and techniques for secure fastening
Installers should use corrosion-resistant nails (galvanized steel or aluminum) with heads large enough to hold the siding without pulling through. The nails should penetrate at least 3/4 of an inch into solid wood.
Common mistakes that cause buckling or loose panels
The most common DIY and amateur mistake is nailing the siding too tightly. Vinyl siding must be hung, not pinned to the wall. The nail should be driven into the center of the nailing slot, leaving about a dime’s thickness (1/16-inch) of space between the nail head and the vinyl. This allows the panel to slide freely back and forth as it expands and contracts. Driving nails at an angle or into the panel itself instead of the slot will also cause problems.
Heritage Exteriors’ attention to detail in every nail placement
Our in-house crews are trained on these critical techniques. We understand that every single nail matters. We take the time to ensure proper spacing and depth on every panel, guaranteeing a finish that will remain straight and stable through decades of Sacramento summers and winters. It’s this level of detail that homeowners across the region trust.
Step 5 — Trimming, Sealing, and Finishing Touches
The trim pieces are what give the siding installation a sharp, complete look. This includes corner posts, J-channels around windows and doors, and soffit/fascia trim.
Installing trim, corner posts, and J-channels
J-channel is used to trim out windows and doors, creating a channel for the siding panels to tuck into. Corner posts cover the ends of the siding where two walls meet. These pieces must be installed straight and plumb to create clean lines.
Sealing around windows and doors for weather protection
While the house wrap and flashing provide the primary water barrier, a high-quality exterior caulk should be applied where trim pieces meet windows, doors, and other fixtures. This provides a secondary seal against wind and water, and it gives the installation a clean, finished appearance.
How finishing details affect the overall appearance
This is what separates a good job from a great one. Are the mitered corners on the window trim tight? Are the J-channels cut cleanly? Does the soffit meet the siding in a straight line? These small details make a huge difference in the final curb appeal of your home.
Step 6 — Cleanup and Final Inspection
The job isn’t done until your property is spotless and you are completely satisfied with the work.
Why clean job sites matter
A contractor’s respect for your property is a reflection of their overall professionalism. A clean job site is a safe job site. Crews should clean up all debris, scrap materials, and stray nails at the end of every day. This is a non-negotiable part of the process for Heritage Exteriors.
What your installer should check before wrapping up
Before leaving, the project manager should conduct a final walk-through with you. They will inspect the entire job, checking for any imperfections, ensuring all fixtures have been re-mounted correctly, and confirming that the siding is performing as it should.
Heritage’s promise: no mess left behind, just results
Our commitment to you is simple: we will leave your home more beautiful than we found it, with nothing left behind but a stunning, durable exterior. The only sign we were there will be your new siding.
How Heritage Exteriors Delivers a Seamless Installation Experience
Our entire process is designed around transparency, quality, and customer satisfaction.
In-house crews and project management from start to finish
We never use subcontractors. From your initial consultation to the final nail, you will be working with dedicated Heritage Exteriors employees. This gives us complete control over quality and scheduling, and it gives you a single point of contact and accountability.
Transparent communication and on-time completion
We believe in keeping you informed every step of the way. Your project manager will provide regular updates and is always available to answer your questions. We respect your time and stick to our projected timelines.
What makes Heritage a top-rated siding company in Sacramento
It’s our combination of superior craftsmanship, high-quality materials, and a customer-first approach. Since 2014, our family-owned business has built a reputation for delivering on our promises, earning hundreds of positive reviews from homeowners across Northern California.
Common Vinyl Siding Installation Mistakes to Avoid
When getting quotes, be wary of contractors who suggest cutting these corners.
Nailing too tightly or skipping flashing
As discussed, nailing too tightly is the cardinal sin of vinyl installation and will cause warping. Skipping or improperly installing flashing around windows is just as bad, inviting leaks and rot.
Ignoring expansion gaps
A “fast” installer might cut panels to fit snugly from end to end. This looks good for a day, but it’s a guaranteed recipe for buckled siding as soon as the weather heats up.
Choosing low-quality materials to cut costs
A low-ball bid often comes with a catch: low-quality materials. Cheaper, thinner vinyl is more prone to cracking and fading. A reputable contractor will use professional-grade materials from trusted manufacturers.
Frequently Asked Questions about the Vinyl Siding Installation Process
How long does vinyl siding installation take?
For an average-sized home in Sacramento, a professional installation, including tear-off and prep, typically takes 5 to 10 days. The exact timeline depends on the size and complexity of your home and the weather.
Can new siding be installed over old siding?
While it’s sometimes possible, we strongly advise against it. Installing over old siding prevents the inspection of your wall sheathing for rot and the proper installation of a new water-resistive barrier. A full tear-off is the only way to do the job right.
What’s included in a Heritage Exteriors siding quote?
Our quotes are transparent and comprehensive. A standard quote includes a full tear-off of old siding, disposal of debris, high-quality house wrap and flashing, professional-grade vinyl siding and trim, all labor by our in-house crews, and a thorough site cleanup.
Does vinyl siding require insulation or underlayment?
A water-resistive barrier (house wrap) is required by code and is essential. An insulated underlayment (foam board) is an optional but highly recommended upgrade that improves energy efficiency and impact resistance.
Ready to Start Your Vinyl Siding Project?
Understanding the installation process empowers you to choose a contractor who will protect your investment and deliver results you’ll love for years. Don’t settle for a company that cuts corners. Choose a team that values craftsmanship as much as you value your home.
Contact Heritage Exteriors today for a free quote and see why homeowners across Sacramento trust us for quality siding installation. Call 916-546-2991 or request your free, no-pressure estimate online.


