There are few words that strike fear into the heart of a homeowner quite like “termites.” These tiny, relentless insects are nature’s most efficient recyclers, tasked with breaking down dead wood on the forest floor. Unfortunately, they don’t distinguish between a fallen log and the wood siding protecting your home. For them, your house is simply an all-you-can-eat buffet.
Termite damage is often called “the silent destroyer” because it can go undetected for years. By the time you notice a mud tube on your foundation or a hollow sound when you knock on a wall, the insects may have already chewed through thousands of dollars’ worth of equity. In regions with mild climates like California, where wood siding is a popular architectural choice, the threat is year-round.
Discovering you have wood siding termites can be overwhelming, but panic is not a strategy. Knowledge is. Understanding the extent of the damage and knowing your repair options is the first step toward reclaiming your home. Whether it’s a minor localized patch or a major renovation, there are proven methods to fix termite damage and prevent these pests from returning.
This comprehensive guide will walk you through the signs of infestation, how to assess the severity of the damage, and the best repair options available to homeowners today.
The Threat Beneath the Paint
To understand the repair, you must first understand the damage. Termites eat cellulose, the organic fiber found in wood. When they attack siding, they typically eat it from the inside out. They leave the outer layer of paint or varnish intact to protect themselves from the sun and predators. This is why a board can look perfectly healthy from the street but be completely hollow inside.
Subterranean vs. Drywood Termites
The repair strategy often depends on which enemy you are fighting.
- Subterranean Termites: These are the most destructive. They live in the soil and build mud tubes to travel from the ground to your wood siding. They require moisture and usually attack the bottom rows of siding first. Damage from subterranean termites often involves significant structural issues because they eat through the siding and into the framing studs behind it.
- Drywood Termites: These pests do not need contact with the soil. They fly into cracks in your siding or attic vents and set up shop directly inside the wood. Their colonies are smaller, but they can be harder to locate because they don’t leave mud tubes. They create “kick-out holes” to push their droppings (frass) out of their tunnels.
Regardless of the species, the result is the same: the structural integrity of your siding is compromised. It can no longer effectively block water, insulate your home, or withstand impact.
Identifying the Extent of the Damage
Before you can decide on a repair option, you need to know what you are dealing with. Is it just a few boards, or is the entire wall compromised?
The Visual Inspection
Start by walking the perimeter of your home. Look for these tell-tale signs:
- Mud Tubes: Brown, pencil-width tunnels running up your foundation or across the siding.
- Blistering Paint: Uneven or bubbling paint can indicate that termites are tunneling just below the surface.
- Frass: Small piles of pellets that look like sawdust or coffee grounds near the base of the wall.
- Swarmers: Discarded wings near windowsills or doors.
The “Sound” Test
Take the handle of a screwdriver and gently tap on your wood siding. Healthy wood sounds solid and crisp. Termite-damaged wood sounds dull, flat, or hollow. If your tapping easily punches a hole through the wood, you have severe damage.
The “Poke” Test
In suspicious areas (especially near the ground or where moisture collects), press a flathead screwdriver against the wood. If it sinks in easily or the wood crumbles, active infestation or rot is present.
Note: If you find live termites, stop immediately. Do not attempt to repair the wood yet. You must hire a pest control professional to eliminate the colony first. repairing the wood while the termites are still active is a waste of money—they will just eat the new repairs.
Repair Option 1: Wood Hardeners (For Superficial Damage)
If you are lucky enough to catch the infestation very early, the damage might be merely cosmetic. Perhaps the termites gouged a few channels in the surface of a board, but the board itself is still structurally sound.
When to Use This Method
- The damage is shallow (less than a 1/4 inch deep).
- The area is small and localized.
- The termites are confirmed dead.
- The structural integrity of the board is not compromised.
The Process
- Clean the Area: Scrape away any loose paint and dig out the soft, chewed-up wood fibers until you reach hard, healthy wood.
- Apply Wood Hardener: This is a liquid resin that soaks into the wood fibers and solidifies them. Brush it onto the damaged area and let it dry. It reinforces the remaining wood structure.
- Fill the Void: Use a high-quality exterior wood filler or epoxy putty to fill the gouges. Press it firmly into the holes to avoid air pockets.
- Sand and Paint: Once the filler is dry, sand it flush with the surrounding siding. Prime the spot and paint it to match the rest of the wall.
Pros: Inexpensive, easy DIY project.
Cons: Only works for very minor damage; does not address structural weakness.
Repair Option 2: The “Dutchman” Patch (For Localized Damage)
Sometimes, the termites have destroyed a specific chunk of a board, but the rest of the plank is fine. Replacing a 16-foot board for a 6-inch damaged spot is unnecessary. In this case, a “Dutchman” patch is the professional’s choice for termite damage repair.
When to Use This Method
- The damage is isolated to a small section of a board.
- The damage goes all the way through the board.
- The sheathing (the layer behind the siding) is undamaged.
The Process
- Mark the Cut: Draw a square or rectangle around the damaged area.
- Cut it Out: Use an oscillating multi-tool or a sharp chisel to carefully remove the damaged section. Be careful not to cut into the waterproof barrier (house wrap) behind the siding.
- Prepare the Patch: Cut a new piece of siding that matches the existing profile perfectly. It should be cut for a tight fit.
- Install the Patch: Apply exterior wood glue to the edges of the patch and slide it into place. Secure it with galvanized finish nails.
- Finish: Fill the nail holes and the seams with wood filler. Sand, prime, and paint.
Pros: Preserves the majority of the original wood; cost-effective.
Cons: Requires precise cutting skills; difficult to match aged wood grain perfectly.
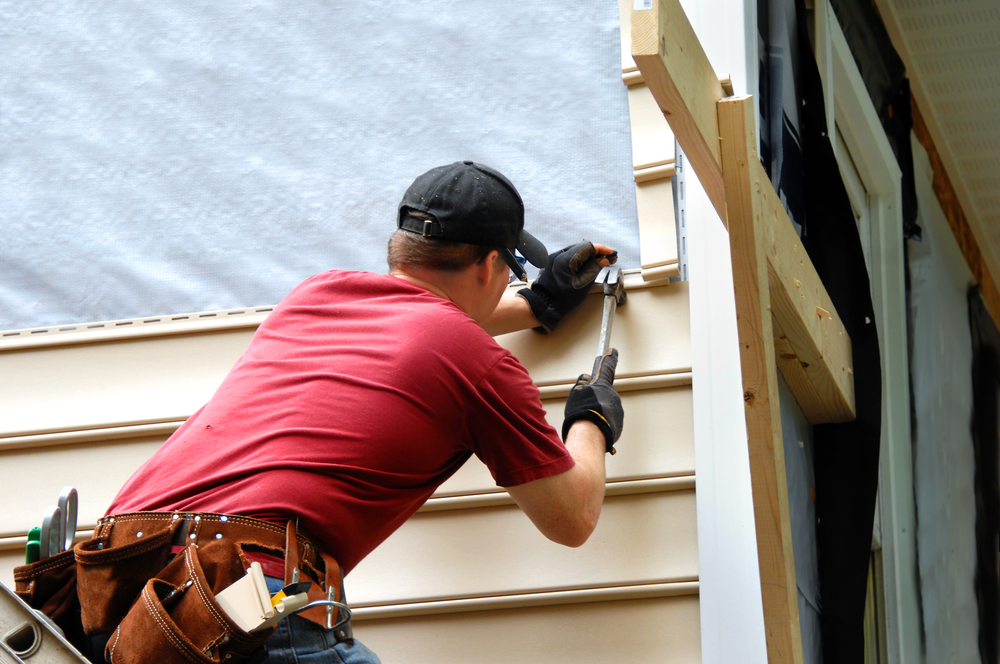
Repair Option 3: Single Board Replacement
If the termites have tunneled extensively through a board, making it hollow along its length, patching is not enough. The entire board must go. This is a common scenario for clapboard or lap siding.
When to Use This Method
- The board sounds hollow along more than 30% of its length.
- The board is crumbling or warped due to internal damage.
- The adjacent boards are healthy.
The Process
- Remove the Nails: Siding is usually nailed at the top, and those nails are covered by the board above. You will need a flat pry bar to gently lift the upper board and a hacksaw to cut the hidden nails.
- Remove the Board: Slide the damaged board downward and out.
- Inspect Behind the Scene: This step is crucial. With the board gone, check the building paper and sheathing. Did the termites go deeper? If the sheathing looks chewed, you have a bigger problem (see Option 5).
- Install the New Board: Cut a new board to length. Important: Prime the back and ends of the new board (back-priming) to protect it from moisture and future pests. Slide it into place and nail it with stainless steel ring-shank nails.
- Seal and Paint: Caulk the vertical joints (but not the bottom horizontal edge—let the wall breathe!). Paint the new board.
Pros: Restores full strength to that section of the wall; looks cleaner than a patch.
Cons: Can be labor-intensive to remove nails without damaging surrounding boards.
Repair Option 4: Sectional Wall Replacement
Termites rarely stop at one board. If they found a moisture source, they likely spread vertically and horizontally. You may find a 4-foot by 4-foot section of wall where multiple boards are compromised.
When to Use This Method
- Multiple adjacent boards are damaged.
- The infestation was centered around a window, door, or corner post.
- You want to ensure there is no hidden damage in a specific zone.
The Process
- Strip the Area: Remove all siding in the affected zone. Don’t try to save borderline boards—it’s better to clear the area to see the full scope.
- Structural Assessment: This exposes the wall studs and sheathing. If the termites have eaten into the framing, you may need a carpenter to “sister” new studs (bolt new wood next to the damaged wood) to restore structural load-bearing capacity.
- Replace Sheathing: If the plywood sheathing is damaged, cut it out and replace it. This is also a good time to upgrade the weather-resistive barrier (house wrap) in that section.
- Re-side: Install new siding over the repaired section.
Pros: Allows for inspection and repair of structural framing; fixes the root of the problem.
Cons: More expensive; requires professional skills to integrate new waterproofing with old.
For homeowners facing this level of damage, it is highly recommended to consult with professionals. The team at Hexteriors specializes in these types of complex siding repair projects, ensuring that the structural repairs are just as sound as the cosmetic ones.
Repair Option 5: Full Siding Replacement
This is the nuclear option, but sometimes it is the only responsible choice. If the termite damage is widespread, affecting multiple walls, or if the wood siding is old and rotting regardless of the termites, spot repairs become a money pit.
When to Use This Method
- Damage is found on multiple sides of the house.
- The cost of spot repairs approaches 50% of the cost of a new install.
- You want to upgrade to a termite-resistant material.
- You want to improve the home’s energy efficiency (by adding insulation during the project).
The Opportunity for Upgrade
If you are forced to re-side due to termites, look at it as an opportunity to “termite-proof” your future.
- Fiber Cement Siding: This material is composed of cement, sand, and cellulose fiber. It is completely inedible to termites. It looks like wood but has the durability of masonry.
- Treated Engineered Wood: Some modern wood products are treated with zinc borate, which is toxic to termites, offering the look of real wood with built-in protection.
Exploring full residential siding services can open the door to materials that virtually eliminate the risk of future infestations.
Hidden Dangers: When Termites Eat the Structure
The scariest part of wood siding termites isn’t the siding itself; it’s what the siding covers. Siding is just the skin. The bones of your house—the studs, headers, and sill plates—are also made of wood.
If you peel back a damaged siding board and see that the termites have tunneled into the sheathing or the studs, the scope of your project has changed from “siding repair” to “structural remediation.”
Warning Signs of Structural Damage
- Cracked Drywall: If the studs inside the wall are hollowed out, the wall may sag, causing cracks in your interior drywall.
- Sticking Doors/Windows: If the header above a window is weakened, the weight of the roof can push down on the window frame, making it hard to open.
- Sagging Rooflines: In extreme cases, if the load-bearing walls are compromised, the roofline may appear uneven.
Do not attempt to fix structural damage yourself. This requires shoring up the house, transferring loads, and installing new framing members. It is critical to hire a licensed contractor who understands structural loads.
Preventing Future Infestations
Once you have invested time and money to fix termite damage, the last thing you want is a sequel. Prevention is cheaper than repair.
1. Eliminate Wood-to-Ground Contact
This is the #1 rule. Your wood siding should never touch the soil. There should be a minimum of 6 inches of clearance between the ground (mulch, dirt, grass) and the bottom of your siding. This gap allows you to see mud tubes if they try to climb up.
2. Moisture Control
Termites love wet wood.
- Fix Leaks: Repair leaky faucets, gutters, and downspouts immediately.
- Divert Water: Ensure downspouts direct water at least 4-6 feet away from the foundation.
- Ventilation: Ensure your crawlspace and attic are well-ventilated to reduce humidity buildup.
3. Maintain the Paint Seal
Paint is your first line of defense. Termites (especially drywood termites) look for cracks and crevices to enter the wood. A thick, continuous coat of paint seals these entry points. Inspect your paint annually and caulk any gaps around trim or corners.
4. Keep Vegetation Back
Bushes and trees trap moisture against the siding and provide a “bridge” for termites to bypass your treated foundation soil. Keep all vegetation trimmed at least 12 inches away from the siding.
5. Annual Inspections
Hire a pest control professional to inspect your home once a year. They have the tools and training to spot activity that you might miss. Early detection turns a $10,000 problem into a $200 problem.
The Cost of Repair vs. Replacement
Homeowners often agonize over the budget. How much is too much for a repair?
- Minor Repairs: Patching a few holes or replacing a couple of boards typically costs a few hundred dollars (mostly labor).
- Major Repairs: Replacing large sections, especially if structural work is needed, can run into the thousands.
- The 50% Rule: A good rule of thumb in construction is the 50% rule. If the cost of repairing the termite damage is 50% or more of the cost of re-siding the entire wall or house, it is usually smarter to replace. New siding adds value to the home and resets the warranty clock; extensive repairs do not.
Why Professional Help Matters
While a handy homeowner can patch a small hole, termite damage is tricky. It is hard to know when you have found “the end” of the tunnel. You might replace a board, paint it, and feel good, only to realize six months later that the colony is still active in the wall cavity next to your repair.
Professional siding contractors bring a holistic view to the project.
- They look deeper: They know how to probe for structural damage without destroying your house.
- They match the look: Matching new wood to weathered, 20-year-old siding is an art form. Pros know how to source and finish materials to blend the repair seamlessly.
- They fix the water: Termites usually follow water. A pro will identify why the wood was wet enough to attract termites in the first place—be it bad flashing, poor drainage, or lack of caulking—and fix that root cause.
Conclusion
Finding termite damage in your wood siding is a stressful event, but it is not the end of the world. Wood is a resilient material, and modern repair techniques allow us to restore homes to their former glory. The key is to act fast. The longer you wait, the more they eat.
Start with a thorough inspection. Determine if the damage is surface-level or structural. Choose the repair option that fits your budget and the severity of the infestation—whether that’s a simple Dutchman patch or a transition to termite-proof fiber cement siding.
Most importantly, don’t let the termites win the war. Reclaim your home, fortify your defenses, and ensure your siding continues to protect your family for decades to come.
If you suspect your home has fallen victim to these silent destroyers and need an honest assessment of your repair options, contact the experts at Hexteriors. We can help you navigate the repair process and ensure your home is solid, safe, and termite-free.


