Knowing what to expect can make a big home improvement project feel a lot less stressful. A full siding replacement is one of the most dramatic ways to update your home’s look and performance — but many homeowners aren’t sure how the process actually unfolds.
From the first day of removal to the final cleanup, every stage of a siding replacement has a clear purpose. Understanding the timeline helps you plan ahead, know what your home will look like each day, and see how experienced contractors keep everything on track.
At Heritage Exteriors, our team takes pride in maintaining clear communication, a spotless job site, and craftsmanship that shows in every detail. Here’s how we manage a siding replacement project from start to finish — efficiently, cleanly, and with complete transparency.
What to Expect Before Your Siding Replacement Starts
A successful project begins long before the first hammer swings. The preparation phase is crucial for ensuring the entire process runs smoothly, on time, and on budget.
The Initial Inspection and Estimate
The journey starts with a thorough on-site consultation. A project specialist from Heritage Exteriors will visit your home to perform a detailed inspection of your existing siding, looking for signs of damage, rot, and installation issues. We take precise measurements, discuss your goals, and answer all your questions. Afterward, you’ll receive a comprehensive, line-item estimate that clearly outlines the full scope of work and a firm price. There are no hidden fees or surprises.
Choosing Materials, Colors, and Design Details
This is the creative part of the process. Once you decide to move forward, we help you select the perfect materials for your home’s style and your region’s climate. Whether you’re choosing James Hardie fiber cement for its durability in the Sacramento sun or its resistance to Tahoe’s freeze-thaw cycles, we guide you through all the options. You’ll finalize your siding style (lap, shingle, panel), color choices, and trim design to create the exact look you envision.
Preparing Your Home and Yard for Installation
Before our crew arrives, there are a few simple steps you can take to prepare. We ask homeowners to clear the areas immediately surrounding their home’s exterior. This includes moving patio furniture, grills, potted plants, and any vehicles from the driveway. Inside, it’s a good idea to remove pictures or fragile items from walls, as the hammering outside can cause vibrations.
Day 1 — Site Setup and Old Siding Removal
The first day on-site is all about preparation and demolition. This is when your home’s transformation truly begins, and our crew’s professionalism immediately becomes apparent.
How Crews Protect Landscaping and Outdoor Areas
Our first task is to protect your property. Our in-house crews lay down tarps and protective coverings over landscaping, walkways, and air conditioning units near the work area. We treat your home with the same care and respect we would our own. A clean and organized job site is a hallmark of the Heritage Exteriors process, and it starts before the first piece of siding comes off.
Safe and Efficient Removal of Existing Siding
Next, the tear-off begins. Our team works methodically around the house to remove all the old siding, carefully prying it away from the structure. This is a physically demanding and often noisy part of the process. The old material is neatly placed into a designated dumpster or trailer for proper disposal, minimizing the mess on your property.
What Homeowners Should Expect During Tear-Off
The tear-off is typically the loudest and dustiest phase of the project. You will hear banging and the sounds of tools as the old siding is stripped away. By the end of the day, your home will be wrapped in its original sheathing and house wrap (if any exists), fully exposed and ready for the next critical step.
Day 2 — Surface Preparation and Repairs
With the old siding gone, day two is dedicated to what’s underneath. This is one of the most important stages, as it ensures the new siding will be installed on a solid, structurally sound, and properly protected surface.
Checking for Hidden Damage or Moisture Issues
This is the moment of truth. Stripping the old siding allows us to perform a complete inspection of your home’s structural sheathing. We look for soft spots, water stains, and any signs of wood rot, paying special attention to vulnerable areas around windows, doors, and rooflines. Any hidden damage that was previously concealed is now identified.
Quick Check: If any rot or moisture damage is found, what happens next? A professional contractor like Heritage Exteriors will immediately communicate the findings to you, explain the necessary repairs, and provide a clear change order for your approval before proceeding. We believe in total transparency.
Prepping the Walls for New Siding Installation
Once any necessary repairs are made, we prepare the walls for the new siding system. This involves installing a new, high-performance weather-resistive barrier (WRB), or house wrap. This material acts as your home’s last line of defense against moisture. Our James Hardie Preferred crews meticulously install it according to manufacturer specifications, sealing all seams with special tape to create a continuous, waterproof drainage plane.
Why Proper Prep Ensures Long-Term Durability
You can’t put beautiful new siding on a damaged or poorly prepped wall. The integrity of the work done on day two directly impacts the longevity and performance of your entire siding system. Proper repairs and a perfectly installed WRB are non-negotiable steps that prevent future water damage and protect the investment you’re making in your home.
Day 3–4 — Installing the New Siding
This is when the visual transformation takes off. Over the next couple of days, you’ll see your new siding go up, and your home’s new look will begin to emerge. Please note, for larger or more complex homes, this phase can take longer than two days.
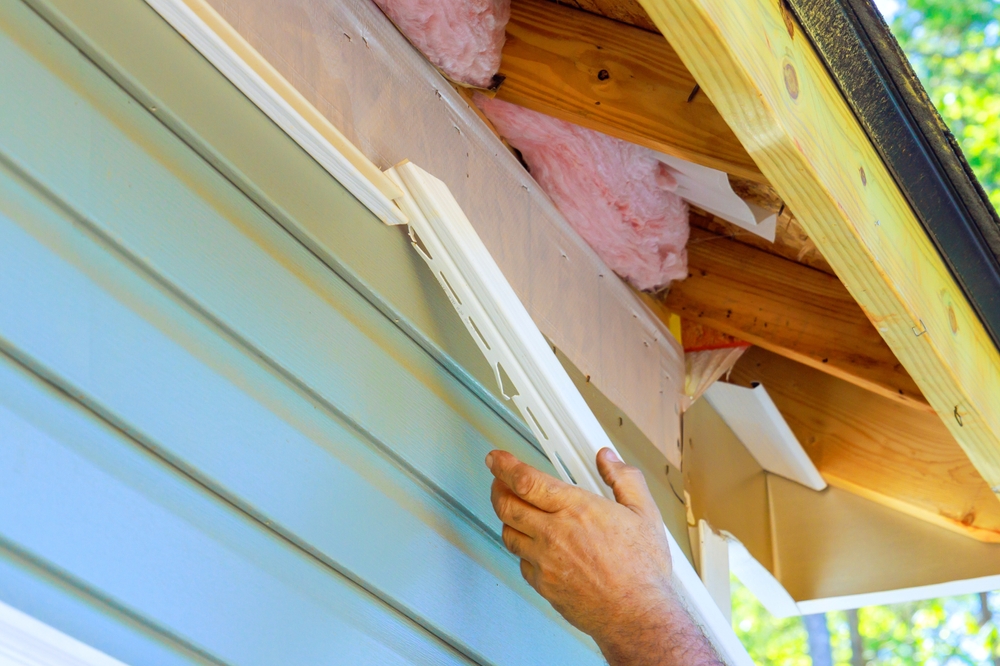
Step-by-Step: Measuring, Cutting, and Fastening
Siding installation is a craft that requires precision. Our skilled crews begin by establishing a level starting point and then work their way up the wall. Each panel is carefully measured, cut to size with specialized tools to minimize dust, and fastened to the wall according to the strict guidelines set by the manufacturer.
How Heritage Exteriors Ensures Perfect Alignment and Finish
Our status as a James Hardie Preferred Contractor means our installers have been trained and audited by the manufacturer. They know the exact nail placement, the correct gap to leave at joints for expansion and contraction (critical in Sacramento’s heat), and the proper techniques to keep every course of siding perfectly level and aligned. This expertise is what creates a flawless, high-end finish.
Common Installation Mistakes Skilled Crews Avoid
An amateur crew might overdrive nails (damaging the siding), place nails incorrectly (voiding the warranty), or fail to install flashing properly. Our experienced, in-house crews avoid these critical errors, ensuring your siding not only looks great but is also fully compliant with its warranty.
Day 5 — Trim, Sealing, and Finishing Touches
With the main fields of siding installed, this day is dedicated to the details that complete the look and seal the building envelope against the elements.
Installing Trim Boards, Flashing, and Caulking
Our crew installs the trim around windows, doors, and at the corners of your home. This is also when all remaining flashing is integrated to direct water away from vulnerable areas. Then, one of the most critical steps occurs: caulking. Every seam, joint, and transition point is sealed with a high-quality, flexible sealant that is designed to last for decades and withstand the climate, whether it’s Bay Area moisture or Tahoe’s freeze-thaw cycles.
Painting, Touch-Ups, and Color Matching
If you’ve chosen pre-finished siding like James Hardie’s ColorPlus® Technology, this step is minimal, involving only minor touch-ups. If your siding is primed for paint, this is when the painting would occur (which may add days to the timeline). Our teams are meticulous about creating a clean, consistent finish.
Final Details That Protect Against Weather and Moisture
The finishing details are all about long-term protection. This includes installing light blocks for exterior fixtures, vent covers, and ensuring every potential entry point for water is sealed tight. It’s this painstaking attention to detail that sets a professional job apart.
Day 6 — Cleanup and Final Walkthrough
The project is nearing its conclusion. The final day is focused on restoring your property to its original condition and ensuring your complete satisfaction.
How Heritage Exteriors Keeps Your Property Clean
We take cleanup seriously. Our crew performs a final, thorough sweep of the entire property. We remove all debris, use magnetic rollers to pick up stray nails from your lawn and driveway, and take down all protective coverings. Our goal is to leave your property looking better than when we arrived.
Reviewing Workmanship and Warranty Details
The project concludes with a final walkthrough with you and your project manager. We’ll walk the property together, inspecting the finished work and answering any questions. We’ll also provide you with all the necessary documentation for your manufacturer and workmanship warranties.
What Happens After Your Project Is Complete
Our relationship doesn’t end when we drive away. We stand behind our work. Should you have any questions or concerns down the road, our family-owned business, which has served Northern California since 2014, is here to help.
How Heritage Exteriors Keeps You Informed Every Step of the Way
We understand that a home remodel can be disruptive. That’s why we make communication a top priority throughout the entire siding replacement process.
Daily Communication and Progress Updates
You will never be left wondering what’s happening with your project. Your dedicated project manager will provide regular updates, letting you know what was accomplished each day and what to expect the next. You will have their direct contact information for any questions that arise.
How We Handle Weather Delays or Unexpected Issues
If we encounter unforeseen structural damage or if a storm causes a weather delay, we communicate with you immediately. We’ll explain the issue, present a clear plan to address it, and adjust the timeline accordingly. You are always kept in the loop.
Real Sacramento Homeowner Examples and Testimonials
Our clients consistently praise our clean job sites and proactive communication. A recent homeowner in a Sacramento suburb noted, “The crew was incredibly professional. They cleaned up every single day, and our project manager kept us informed every step of the way. We always knew what was going on.”
View Our Siding Replacement Project Gallery
Seeing is believing. The best way to understand the quality of our process is to see the results.
Real Before-and-After Projects Across Northern California
Our online gallery showcases the stunning transformations we’ve completed for homeowners in Sacramento, the Bay Area, Lake Tahoe, and beyond. See how we turn dated, worn-out exteriors into beautiful, protected homes.
See Our Clean Worksites and Professional Finishes
Browse photos that highlight not just the finished product but also our process—clean worksites, meticulous installation, and attention to detail that prove our commitment to quality from start to finish.


