Your home’s siding is its first line of defense against the elements. It shields your house from rain, wind, and the intense Northern California sun while playing a crucial role in its curb appeal and energy efficiency. When you notice a crack, a warped panel, or signs of moisture damage, it’s more than just a cosmetic issue—it’s a signal that your home’s protective barrier has been compromised. Understanding what goes into a professional siding repair can demystify the process and give you confidence in the investment you’re making to protect your home.
At Hexteriors, we’ve built our reputation on transparency, quality craftsmanship, and a commitment to customer satisfaction. We believe homeowners deserve to know exactly what to expect when they entrust their property to us. This detailed breakdown will walk you through every phase of our professional siding repair process, from the initial phone call to the final inspection. We will explain the “why” behind each step, so you can see how our meticulous approach ensures a durable, seamless, and lasting solution for your home’s exterior.
The Initial Consultation: Understanding Your Needs
Every successful siding repair project begins with a thorough conversation. When you first contact Hexteriors, you’re not just scheduling a service; you’re starting a partnership. Our goal during this initial phase is to listen carefully to your concerns, understand the issues you’ve observed, and gather the preliminary information needed to prepare for an on-site assessment.
Step 1: Your First Call or Inquiry
Whether you reach out by phone or through our online contact form, our friendly office staff will guide you through the first steps. We’ll ask a few key questions to get a clear picture of the situation:
- What type of siding do you have? (e.g., fiber cement, vinyl, wood)
- What specific problems have you noticed? (e.g., cracks, holes, warping, loose panels, discoloration, suspected rot)
- Where is the damage located on your home? (e.g., a specific wall, around a window, near the foundation)
- Do you know what might have caused the damage? (e.g., storm, impact from an object, age)
- How long have you been noticing the issue?
This initial information helps us match your project with the right expert and ensures our technician arrives at your home prepared. We will then schedule a convenient time for a free, no-obligation on-site inspection and estimate.
The On-Site Inspection: A Detailed Damage Assessment
A successful repair depends on an accurate diagnosis. Simply patching over a visible crack without understanding its root cause is a temporary fix at best. Our on-site inspection is a comprehensive evaluation designed to identify both the obvious damage and any underlying issues that could cause problems down the line. This is where our expertise in serving Sacramento, the Bay Area, and Lake Tahoe truly shines, as we understand the specific challenges posed by the local climate.
Step 2: The Arrival and Walk-Around
When our siding specialist arrives, they will begin with a systematic walk-around of your property. They’ll start by examining the areas you’ve identified, but their inspection won’t stop there. They will assess the entire exterior to check for any other signs of wear or potential vulnerabilities. This holistic view is critical because damage in one area can sometimes be a symptom of a more widespread issue.
Step 3: Probing and Material Analysis
Our technician will get up close with your siding to perform a detailed analysis. This involves:
- Tactile Inspection: Gently pressing on panels to check for softness or sponginess, which often indicates moisture has penetrated the siding and is affecting the substrate beneath.
- Visual Analysis: Looking for hairline cracks, peeling paint, chalky residue, or discoloration. These can be early indicators of material failure or water intrusion.
- Seam and Joint Evaluation: Checking the caulking and flashing around windows, doors, and corner trim. Failed seals are one of the most common entry points for moisture.
- Identifying the Cause: Determining if the damage is from impact, moisture, pests, heat exposure, or improper installation. For example, vinyl siding that is nailed too tightly can buckle and warp in the summer heat, while wood siding with failing paint is vulnerable to rot.
This detailed evaluation allows us to determine if a targeted siding repair in Sacramento is sufficient or if a larger section needs replacement. Our diagnosis is always based on providing a long-term solution, not a quick patch.
Creating Your Custom Repair Plan and Estimate
With a complete understanding of the damage, we move to the planning stage. We believe in providing clear, transparent, and detailed estimates so you know exactly what to expect. There are no hidden fees or surprise charges with Hexteriors.
Step 4: Material Matching and Sourcing
One of the biggest challenges in siding repair is making the new material blend seamlessly with the old. A mismatched patch can be just as unsightly as the original damage. Our team excels at sourcing the right materials.
- For modern siding like James Hardie or vinyl: We identify the exact product line, color, and texture. If the original product has been discontinued, we find the closest available match from current product lines.
- For wood siding: We identify the species of wood (e.g., cedar, redwood) and the profile of the plank (e.g., lap, tongue-and-groove). We then source high-quality wood to match.
- Paint Matching: We take a sample of your existing siding to have the paint color custom-matched. This ensures the repaired section is virtually indistinguishable from the rest of your home.
Step 5: Developing a Scope of Work
Our specialist will create a detailed scope of work that outlines every step of the repair process. This written document will specify:
- The exact location and extent of the siding to be removed.
- Whether the underlying sheathing or weather-resistant barrier needs to be replaced.
- The new materials that will be used, including siding, trim, fasteners, and sealant.
- The preparation and painting process for the new materials.
- The projected timeline for the project.
Step 6: Presenting a Transparent Estimate
You will receive a clear, itemized estimate that corresponds directly to the scope of work. We’ll sit down with you to review the estimate, explain each line item, and answer any questions you may have. We want you to feel fully informed and confident in your decision. We’ll discuss options and make recommendations, but the final choice is always yours. Our goal is to provide value and long-lasting quality, not to upsell you on services you don’t need.
The Repair Process: Precision in Action
Once you approve the estimate, our in-house crew gets to work. Unlike companies that rely on subcontractors, we use our own team of skilled, certified installers. This ensures every project meets our high standards of quality and professionalism from start to finish. Our commitment to excellence is visible in our residential projects.
Step 7: Site Preparation and Safety
Before any work begins, we take great care to protect your property. Our crew will:
- Protect Landscaping: Cover nearby flowerbeds, shrubs, and lawns with tarps to shield them from debris.
- Secure the Work Area: Set up ladders and scaffolding safely and securely. For multi-story homes, we use appropriate safety harnesses and equipment.
- Communicate with You: We’ll let you know our work schedule and keep you informed of our progress each day. We strive to minimize disruption to your daily routine.
Step 8: Careful Demolition and Removal
The first construction step is to remove the damaged siding. This must be done carefully to avoid harming the surrounding, intact siding or the underlying structure.
- Specialized Tools: We use tools like zip tools for vinyl siding or pry bars for fiber cement and wood to carefully unlock and remove only the damaged panels.
- Substrate Inspection: With the old siding removed, we perform a second, more intensive inspection of the sheathing and weather-resistant barrier (like Tyvek). If we find any signs of rot, mold, or water damage that were not visible during the initial inspection, we will stop and consult with you immediately. We will show you the damage, explain the necessary repairs, and provide a clear change order for your approval before proceeding. We never cover up a problem.
Step 9: Structural and Substrate Repair
If the underlying sheathing is compromised, it must be repaired or replaced. A solid, dry, and flat substrate is essential for a successful siding installation.
- Removing Damaged Sheathing: Our crew will cut out any rotted or water-damaged sections of plywood or OSB sheathing.
- Installing New Sheathing: We install new sheathing, ensuring it is properly secured to the wall studs.
- Installing a New Weather-Resistant Barrier: We install a new, high-quality weather-resistant barrier, making sure to overlap the seams correctly and tape them according to manufacturer specifications. This is a critical step in creating a waterproof envelope around your home.
Step 10: Flashing and Sealing
Proper flashing is one of the most important—and often overlooked—aspects of a siding job. Flashing is a thin piece of impervious material (usually metal or vinyl) that directs water away from vulnerable areas.
- Windows and Doors: We ensure that flashing is correctly installed over the top of windows and doors, tucked under the weather-resistant barrier to create a shingle-like effect that sheds water.
- Seams and Joints: We use appropriate flashing at corner joints and where siding meets other materials, like a brick facade or a roofline.
This meticulous attention to waterproofing is what separates a professional repair from a subpar one and is a cornerstone of our siding installation process.
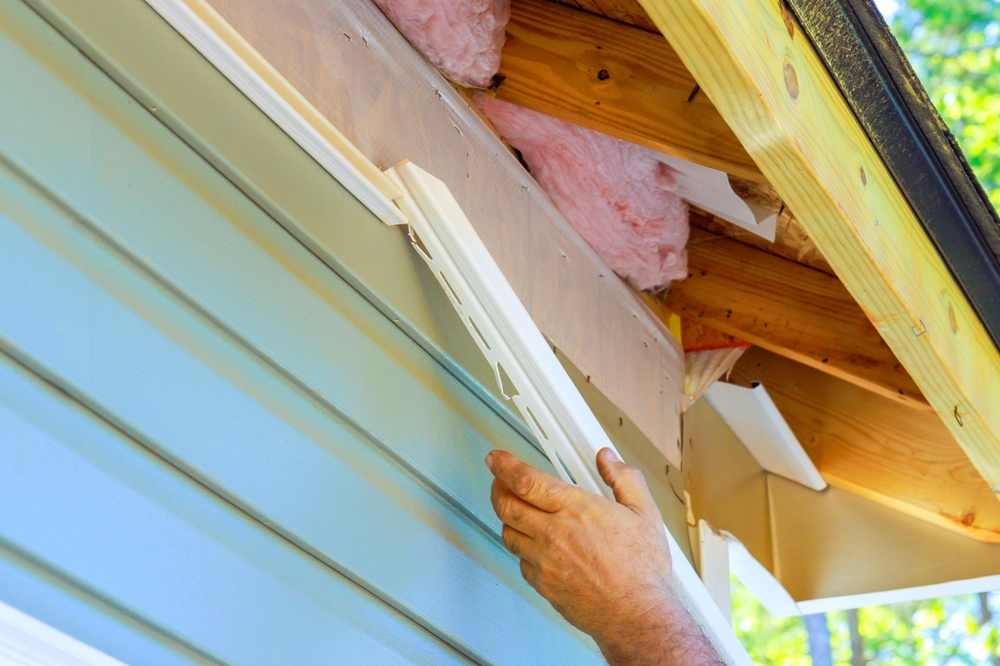
Step 11: Installing the New Siding
With the substrate prepared and waterproofed, it’s time to install the new siding. Our certified installers follow manufacturer best practices to the letter. This is crucial not only for the performance of the siding but also for maintaining its warranty.
- Proper Fastening: We use the correct type of fasteners (e.g., corrosion-resistant nails or screws) and ensure they are driven to the right depth. Siding must be fastened securely but not so tightly that it can’t expand and contract with temperature changes. This is especially important for vinyl siding.
- Correct Spacing and Gapping: We maintain the proper gaps at butt joints and where the siding meets trim, as specified by the manufacturer. These gaps are essential for allowing expansion and are later sealed with high-quality caulk.
- Level and Straight Lines: Our crew uses levels and chalk lines to ensure each course of siding is perfectly straight. Crooked or wavy lines are a telltale sign of an amateur job. The result is a clean, professional look that integrates perfectly with the rest of your home.
Finishing Touches and Final Inspection
The job isn’t done until every detail is perfect. The finishing touches are what elevate a good repair to a great one.
Step 12: Caulking and Sealing
Once the new siding is installed, we seal all the gaps and joints with a high-quality, paintable elastomeric caulk.
- Purpose of Caulk: The caulk provides a final waterproof seal and creates a smooth, finished look. It also allows for minor movement between the siding panels and trim without cracking.
- Application: We apply a clean, consistent bead of caulk and tool it to create a smooth, professional finish.
Step 13: Priming and Painting
For wood or fiber cement siding, painting is the final step in protecting the material.
- Priming: We apply a high-quality primer to the new siding and any new wood trim. The primer ensures strong paint adhesion and provides an extra layer of moisture protection.
- Finish Coats: Using the custom-matched paint, we apply two topcoats for maximum durability and a perfect color match. Our team feathers the paint into the surrounding area to ensure a seamless blend.
Step 14: Final Cleanup and Site Inspection
We believe in leaving your property cleaner than we found it. Our crew will:
- Remove All Debris: All old siding, packaging, and construction waste are loaded up and hauled away.
- Magnetic Sweep: We perform a thorough sweep of your driveway, lawn, and garden beds with a powerful magnetic roller to pick up any stray nails or screws.
- Final Walk-Through: Once the site is clean, our project manager will conduct a final walk-through with you. We’ll review the finished work, ensure every detail meets your satisfaction, and answer any final questions.
Our Commitment to You: Warranty and Long-Term Support
Our relationship with you doesn’t end when we pack up our tools. We stand behind our work with a robust workmanship warranty. This means that if any issue arises as a result of our installation, we will come back and fix it. We are a family-owned company built on a foundation of trust and quality, and we are dedicated to ensuring your complete satisfaction for years to come.
A professional siding repair is an investment in your home’s health, beauty, and value. By following this meticulous, step-by-step process, we ensure that every repair is not just a patch, but a permanent solution that restores the integrity and appearance of your home’s exterior. If you’re seeing signs of siding damage, don’t wait for the problem to get worse. Contact Hexteriors today for a free, comprehensive assessment.


