Vinyl siding is prized for its durability, low maintenance, and affordability, making it a popular choice for homes across Northern California. But it isn’t indestructible. A stray baseball, an errant weed whacker, or even intense summer heat can cause cracks, holes, or warping. When you see this damage, it’s natural to worry about a massive, expensive project. The good news is that in most cases, you don’t need to replace an entire wall. A targeted vinyl siding repair is often all that’s needed to restore your home’s appearance and protection.
The key to a successful repair is understanding what can be fixed, what requires a professional, and how to perform the fix correctly so it lasts. A proper repair should be nearly invisible and just as durable as the surrounding siding. An improper one can lead to water leaks, further damage, and a patch that’s more obvious than the original problem. This step-by-step guide will show you how to diagnose common vinyl siding issues and outline the methods used to fix vinyl siding, empowering you to make the best decision for your home.
Need a Flawless Vinyl Siding Repair?
Our technicians specialize in seamless vinyl siding repairs, from simple crack fixes to full panel replacements. We’ll make the damage disappear.
Get Your Free, No-Obligation Repair Estimate Today!
When Is Vinyl Siding Repair a Viable Option?
The first step is to determine if a localized repair is the right solution. For the vast majority of common issues, the answer is yes. However, there are times when a bigger project is unavoidable.
Scenarios Perfect for a Targeted Repair
A spot repair is the ideal choice when the damage is contained and the rest of your siding is in good health. This includes:
- A Single Cracked Panel: Whether from impact or age-related brittleness, a single cracked panel is a textbook case for replacement.
- A Small Hole or Puncture: A hole from a rock, nail, or other impact can be easily addressed by either patching it or replacing just that one panel.
- One or Two Loose Panels: High winds can sometimes cause the locking mechanism on a panel to come loose. If the panel itself isn’t damaged, it can often be re-secured without any new materials.
- Localized Melting or Warping: If siding has melted from a barbecue grill placed too close or from sun reflection, that specific section can be replaced.
When You Might Need to Consider Full Replacement
A simple repair is not the answer when the problems are systemic. You should consider a larger-scale replacement if:
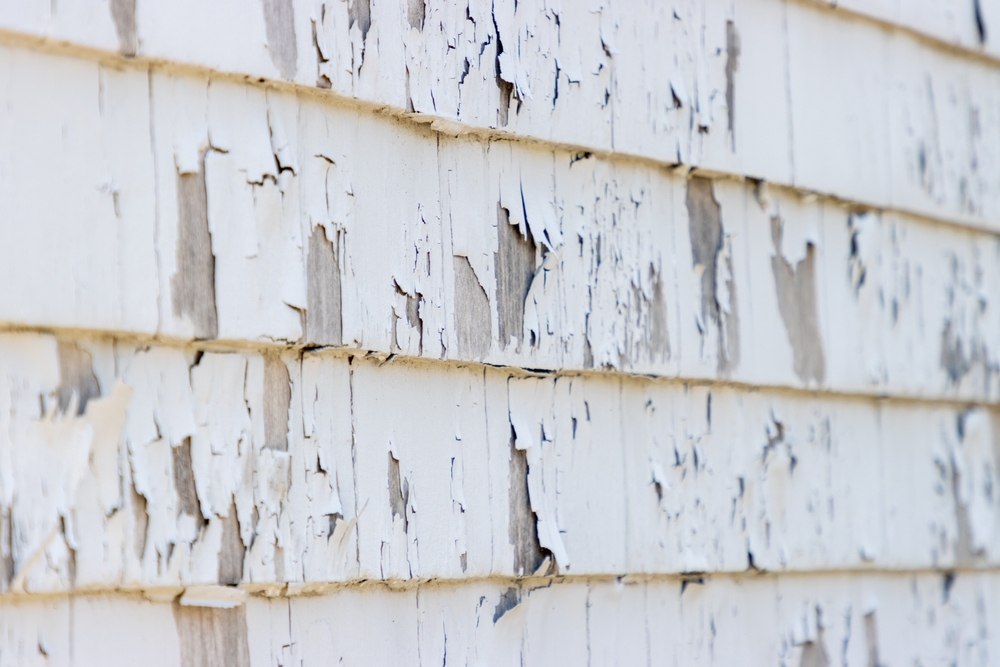
- Widespread Brittleness and Cracking: If you have cracks on multiple panels across different walls, it’s a sign that the vinyl has reached the end of its lifespan due to UV degradation. Replacing one panel will just mean another will crack next month.
- Extensive Fading and Chalking: If the color is gone and the siding leaves a chalky residue on your hand, the material’s protective cap has failed. A new panel will stick out like a sore thumb against the faded siding.
- Signs of Major Underlying Damage: If you see widespread warping or signs of moisture inside your home, the problem is likely bigger than the siding itself. A full removal may be necessary to inspect and repair the sheathing beneath.
Essential Tools and Materials for Vinyl Siding Repair
Attempting a vinyl siding repair without the right tools is a recipe for frustration and further damage. While some items are common household tools, others are highly specialized.
Basic Tools:
- Hammer
- Tape measure
- Pry bar or cat’s paw
- Utility knife with a sharp blade
- Speed square
Specialized Vinyl Siding Tools:
- Zip Tool (or Unlocking Tool): This is the single most important special tool. It has a curved, hooked end designed to safely unlock and separate the interlocking edges of vinyl panels without breaking them.
- Snap-Lock Punch: This tool creates raised tabs or “lugs” in a cut edge of vinyl siding, allowing it to snap securely into the utility trim or the panel below it.
- Nail-Hole Slot Punch: This creates the oblong nail slots required for proper installation, allowing panels to expand and contract with temperature changes.
Materials:
- Replacement vinyl siding panel(s)
- Galvanized or stainless steel roofing nails (1-1/2″ to 2″ long)
- High-quality exterior caulk or sealant (for patching)
- Cleaning supplies (mild soap, water, soft brush)
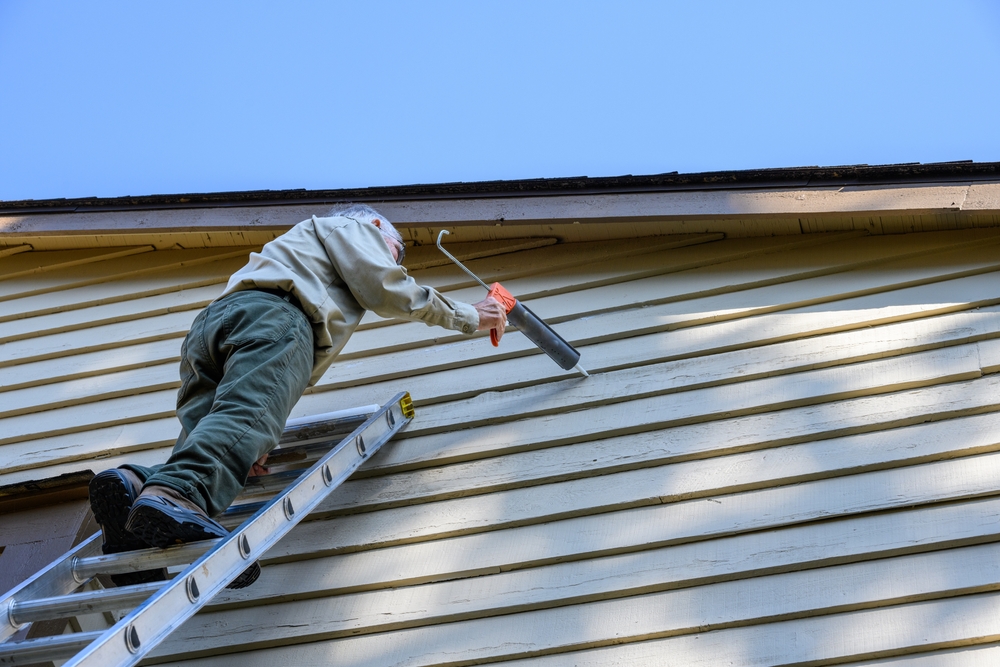
Safety First: Working with Ladders and Heat
Never underestimate the risks of exterior repairs.
- Ladder Safety: If the damage is on a second story, seriously consider hiring a pro. If you must use a ladder, ensure it is on firm, level ground. Maintain three points of contact at all times (two feet and one hand, or one foot and two hands). Never overreach; it’s safer to get down and move the ladder.
- Heat Gun Safety: A heat gun can be used for minor repairs but gets extremely hot. Wear heat-resistant gloves and keep it moving constantly to avoid melting the vinyl. Never point it at flammable materials.
How to Diagnose the Damage
Before you can fix the problem, you need to know exactly what you’re looking at.
- Crack Types: A clean, straight crack is usually from impact. A web of tiny, splintery cracks indicates the vinyl has become brittle with age.
- Loose Panels: Look at the bottom edge of the panel. Has it simply popped out of the lock on the panel below it, or has the entire panel pulled away from the wall, indicating fastener failure?
- Melted Panels: This is usually obvious. The siding will be distorted, warped, and often discolored. The cause is almost always a nearby heat source—a grill, a reflective window, or a dryer vent.
Step-by-Step Fixes for Common Vinyl Siding Problems
Here are the standard methods for tackling the most frequent vinyl siding issues. The most common and effective repair is to replace vinyl siding panel that is damaged.
The Full Panel Swap Using a Zip Tool
This is the most professional and durable method for fixing cracks and holes.
- Unlock the Panel Above: Hook your zip tool into the bottom lip of the panel above the damaged one. Pull down gently and run the tool horizontally along the seam. This will “unzip” the lock and expose the nailing hem of the damaged panel.
- Remove the Old Nails: Use a pry bar or the claw of a hammer to carefully pull out all the nails holding the damaged panel to the wall. Be careful not to damage the sheathing or the panels above and below.
- Remove the Damaged Panel: Once all nails are out, the panel should slide out easily.
- Install the New Panel: Slide the new, color-matched panel into position. The bottom lip should lock securely into the top of the panel below it. You should hear and feel it click into place.
- Nail the New Panel Correctly: This is the most critical step. Place a nail in the center of each nailing slot. Do NOT drive the nail in tight. You must leave a small gap (about the thickness of a dime) between the nail head and the vinyl. The panel should be able to slide slightly left and right. This allows for thermal expansion.
- Lock the Top Panel: Use your zip tool to hook the bottom of the panel you unlocked in step 1 and gently push and guide its lip back over the newly installed panel’s locking edge.
Patching a Small Puncture
For a very small, clean hole where a full panel replacement seems like overkill, a patch is an option.
- Cut a patch from a scrap piece of matching siding. Make it slightly larger than the hole.
- Apply a small amount of high-quality, paintable exterior caulk to the back of the patch.
- Press the patch firmly over the hole and wipe away any excess caulk.
- While functional, this repair is often more visible than a full panel replacement.
Re-Locking a Loose Panel
If a panel has simply popped loose in the wind, you can often fix it without any tools.
- Push the panel flat against the house.
- Use your fingers to apply upward pressure along the bottom edge of the loose panel while pushing it in.
- Work your way down the panel, and you should feel it snap back into the locking channel of the panel below it. If it won’t lock, a zip tool can help guide the lip back into place.
The Art of Color and Texture Matching
A repair is only as good as its appearance. Getting a perfect match is crucial.
- Find a Donor Piece: If you have leftover siding from the original installation, you’re in luck. If not, you can sometimes “steal” a panel from an inconspicuous part of your house (like behind a dense bush or on a shed with the same siding) to use for the repair, and then put the new, slightly different colored panel in the hidden spot.
- Contact the Manufacturer: Look for manufacturer markings on the back of a loose piece of siding. You can often contact them or a local supplier to order a matching panel. Be aware that even the same color can vary slightly between production runs.
- Weathering is a Factor: A brand-new panel will always look slightly different from siding that has been exposed to the California sun for years. The difference is often most noticeable in the first few months and tends to blend in better over time as the new panel weathers.
Preventing Future Vinyl Siding Damage
Once your repair is done, take steps to prevent it from happening again.
- Manage Heat Sources: Keep barbecue grills at least 3-4 feet away from your vinyl siding. If you have low-E windows causing reflection issues, consider installing awnings or window film to diffuse the light.
- Protect from Impact: Use landscape edging or short fences to keep lawnmowers and weed whackers at a safe distance from the siding.
- Control Water: Aim sprinklers so they don’t continuously spray your siding. Constant moisture can encourage mildew and premature wear.
For more information on professional solutions, visit our dedicated Vinyl Siding Repair service page.
When to Call a Professional for Siding Repair
It’s time to call for siding repair Sacramento experts when:
- The damage is on the second story or higher.
- The damage involves multiple panels or is widespread.
- You suspect there is moisture or rot behind the siding.
- You don’t own or feel comfortable using the specialized tools.
- You want a guaranteed, seamless repair backed by a workmanship warranty.
A professional can typically replace vinyl siding panel in under an hour, ensuring a fast, safe, and durable solution. For a full range of solutions, see our main Siding Repair page.
Don’t Live with Damaged Siding. Get It Fixed Right.
A professional repair is fast, affordable, and protects your home’s value. We have the tools and expertise to make your vinyl siding look new again.
Contact Us Today for a Fast and Accurate Quote!
Frequently Asked Questions
Q1: Can you paint vinyl siding to match a repair?
A: Yes, you can paint vinyl siding, but it requires specific preparation and the use of “vinyl-safe” paint that is formulated with a lighter color base to prevent heat absorption and warping. It’s often easier and more durable to replace the panel than to paint it.
Q2: How much does it cost to have a professional replace one vinyl siding panel?
A: The cost is generally very reasonable and consists of a service call fee plus a small labor charge. For a single, easily accessible panel, the total cost is often just a few hundred dollars, which includes sourcing the matching panel and performing the expert repair.
Q3: Is it possible to fix a crack in vinyl siding without replacing the panel?
A: While you can try to fill a small crack with caulk, it is not a permanent solution. The flexing of the vinyl with temperature changes will almost always cause the caulk to fail over time. It also leaves a visible scar. Replacing the panel is the only truly permanent and professional fix.
Q4: My whole wall of siding looks wavy. Is that repairable?
A: Widespread waviness or “oil canning” is almost always a sign of systemic improper installation, where nearly every panel was nailed too tightly. This is not something that can be fixed with a spot repair. The entire wall of siding would need to be removed and re-installed correctly.