There is nothing quite like the timeless, natural beauty of wood and cedar siding. It gives a home a warm, classic look that vinyl and metal simply can’t replicate. But as a natural, organic material, it has one persistent enemy: rot. Discovering a soft, crumbling spot on your beautiful wood siding can be disheartening, evoking images of widespread damage and costly repairs. The fear is that this small spot of rot is just the beginning of a much larger invasion.
The truth is, cedar siding rot is a living fungus, and it will spread if left unchecked. However, the key to protecting your home is early detection and decisive action. As a premier service for wood siding repair Sacramento and throughout Northern California, we know that catching rot early can mean the difference between a simple, targeted repair and a full, expensive replacement. Understanding what causes rot, how to find it, and what your options are for fixing it is the most powerful tool a homeowner can have. This guide will give you the knowledge to identify rot before it spreads and make the best decision to preserve the beauty and integrity of your wood siding.
Found Rot on Your Wood or Cedar Siding?
Don’t let it spread. Our wood siding specialists can expertly remove the rot, repair the damage, and protect your home from future decay.
Schedule Your Free Siding Inspection Today!
What Exactly Is Wood Rot? A Quick Biology Lesson
Wood rot is not just wood getting old or “going bad.” It is a specific type of fungal decay. Microscopic fungal spores are always present in the air. For them to colonize and start consuming your siding, they need four things:
- Food: The cellulose in your wood siding.
- Oxygen: Readily available in the air.
- Warmth: Temperatures between 40°F and 105°F are ideal.
- Moisture: This is the most critical and only controllable factor. Wood needs to have a consistent moisture content of 20% or more for rot fungi to thrive.
When all four conditions are met, the spores germinate and grow hyphae—tiny threads that secrete enzymes to break down the wood, turning firm, strong siding into a soft, spongy mess.
Common Causes of Rot in California Climates
While California is known for its sun, specific regional climates and home maintenance issues create perfect breeding grounds for rot.
Coastal Fog and Bay Area Humidity
In coastal areas from the Bay Area to the North Coast, persistent fog and high humidity mean that siding surfaces stay damp for extended periods. This chronic moisture, especially on north-facing walls that get little sun, is a primary driver of rot.
Sprinklers, Splashback, and Poor Drainage
This is a huge issue in drier areas like Sacramento. Improperly aimed sprinklers that constantly douse the bottom courses of siding are a guaranteed recipe for rot. Similarly, rain splashing back from hard surfaces like concrete patios or driveways keeps the lower boards perpetually wet. Poor grading that slopes towards the house also allows water to pool at the foundation.
Unsealed End-Cuts and Joints
When wood siding is installed, every cut exposes the raw wood “end grain.” End grain is like a bundle of tiny straws and will soak up water much faster than the face of the board. If these cut ends are not meticulously primed and sealed during installation, they become superhighways for water to enter the wood.
Failing Caulk and Paint
Paint and caulk are your siding’s first line of defense. When paint peels or caulk cracks around windows and trim, it creates an opening for water to get in and become trapped behind the board, initiating rot from the inside out.
How to Identify Wood Rot: Early vs. Advanced Stages
Catching rot early is key. Here’s what to look for during your regular home inspections.
The Probe Test: Your Most Important Tool
Your best diagnostic tool is a simple awl or a flat-head screwdriver. Walk around your home and gently probe the wood in vulnerable areas. Healthy wood is firm and offers significant resistance. If the probe sinks in easily with little pressure, you have found rot.
Early Signs of Wood Rot
- Discoloration: Look for wood that is darker than the surrounding areas or has black, green, or white fuzzy growth.
- Peeling or Bubbling Paint: Paint that is blistering or peeling in a specific area is often a sign that moisture is pushing it off the wood from behind.
- Soft or Spongy Texture: Even if the paint looks intact, press firmly on the wood with your thumb. If it feels soft or spongy, the wood underneath has decayed.
Advanced Wood Rot
- Crumbling or Fibrous Wood: The wood will easily crumble into small, cubical pieces (a sign of “brown rot”) or feel soft and fibrous (“white rot”).
- Visible Fungal Growth: In very advanced cases, you might see mushroom-like bodies, known as fruiting bodies, growing out of the wood. This is a sign of a severe, well-established infestation.
- Warped or Sagging Boards: As the wood loses its structural integrity, boards may start to warp, sag, or pull away from the house.
Where Rot Hides: The Most Vulnerable Areas
Rot rarely starts in the middle of a board. It attacks specific weak points where water collects.
- Bottom Edges (Drip Edge): The bottom few courses of siding are most vulnerable due to rain splashback and proximity to damp ground.
- Window and Door Trim: The corners of window and door trim, especially the bottom sill, are notorious for collecting water and rotting.
- Butt Joints: Where two siding boards meet end-to-end, the joint is a prime spot for water intrusion if not properly caulked and flashed.
- Behind Dense Vegetation: Shrubs and vines planted too close to the house trap moisture and create a humid microclimate perfect for fungal growth.
Your Action Plan: From Containment to Repair
Once you find rot, you must act.
Immediate Containment to Prevent Spread
If the rot is damp, the first step is to dry it out. If the source is a sprinkler, adjust it immediately. If it’s a clogged gutter, clean it. For very wet wood, you can aim a fan at the area to accelerate drying. Removing any peeling paint can also help the wood breathe and dry faster.
Repair Option 1: Epoxy Consolidants and Fillers
This method is suitable for small, localized areas of rot where the damage is not yet structural.
- Remove Decayed Wood: Use a wood-carving tool or a sharp scraper to carefully dig out all the soft, rotted wood fiber. You must get back to solid, healthy wood.
- Apply Consolidant: Drill several small holes into the remaining wood and inject a liquid epoxy consolidant. This product soaks into the porous wood fibers and hardens, strengthening them.
- Apply Epoxy Filler: Once the consolidant has cured, use a two-part epoxy wood filler to rebuild the damaged area. Overfill it slightly.
- Shape and Finish: After the epoxy filler cures hard, sand it to match the profile of the surrounding wood, prime it, and paint it.
Repair Option 2: The “Dutchman” Patch
For larger areas of damage on an otherwise sound board, a Dutchman patch is a classic woodworking repair.
- Cut a Clean Pocket: Use a sharp chisel or a router to cut a clean, geometrically shaped “pocket” around the rotted area, ensuring you are removing all decayed wood.
- Fashion a Patch: Cut a piece of new, sound wood (of the same species, like cedar) to fit perfectly into the pocket.
- Glue and Secure: Apply a high-quality exterior wood glue to the patch and fit it into place. Use clamps or fasteners to hold it securely while the glue dries.
- Finish: Sand the patch flush, prime, and paint to match.
Repair Option 3: Full Board Replacement
For boards with extensive rot or structural damage, replacement is the only correct option.
- Cut the Board: Carefully cut the damaged board vertically on both sides of the rot. Use a pry bar to remove the rotted section.
- Remove Nails and Old Piece: Slide a flat pry bar under the board above to gently lift it and expose the nails holding the top of the damaged board. Remove the nails and the rest of the board.
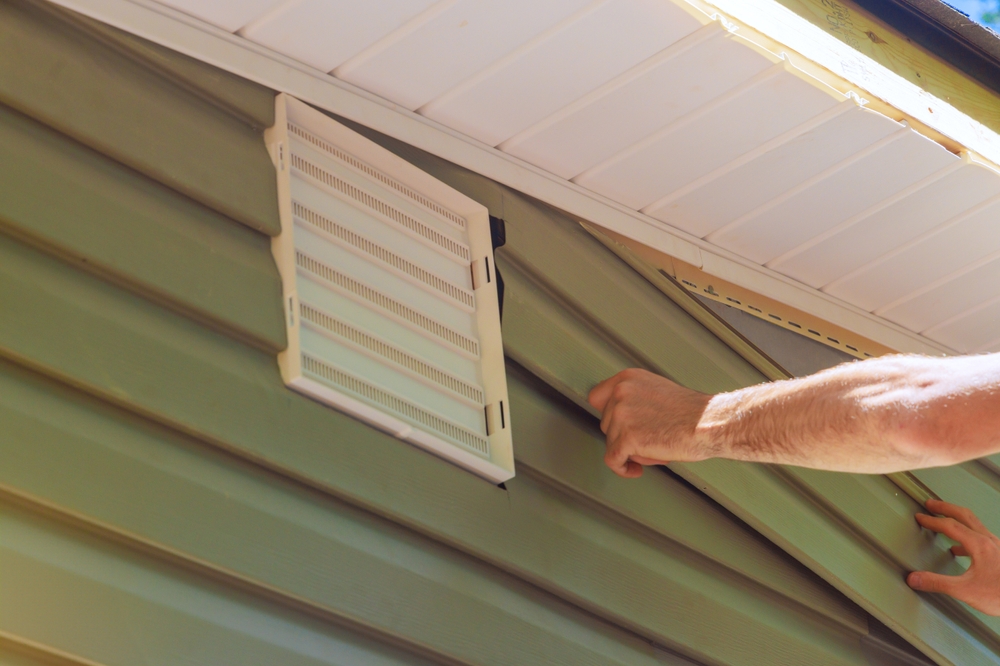
- Inspect and Repair WRB/Flashing: This is a critical step. Inspect the house wrap and flashing behind the board. Repair any tears with contractor’s tape and correct any flashing issues.
- Seal and Install New Board: Cut a new board to fit. Crucially, you must prime and paint all cut ends before installation. Slide the new board into place, nail it correctly, and caulk the joints.
To have this done professionally, contact an expert to repair wood siding through our Siding Repair page.
The Big Decision: When Is Replacement Smarter Than Repair?
- Repair is Best When: The rot is confined to a small, non-structural area on one or two boards, and the rest of the siding is in good condition.
- Replacement is Smarter When: The rot is extensive, affecting more than 20-30% of a wall. If multiple boards are soft, or if the rot has reached the structural sheathing behind the siding, a full
siding replacementis the only way to properly address the problem and protect your home. This is also a chance to upgrade to a more rot-resistant material. Explore your options on our Siding Replacement page.
The Prevention Checklist: Your Best Defense Against Rot
- Manage Water: Ensure gutters are clean and downspouts direct water at least 3-6 feet away from the foundation. Adjust sprinklers to spray away from the house.
- Maintain Clearances: Trim shrubs and trees to provide at least 18 inches of air space between them and your siding. Ensure at least 6-8 inches of clearance between the bottom of your siding and the ground.
- Inspect and Maintain Sealants: Walk your home annually and inspect the caulk around all windows, doors, and trim. Scrape out and replace any caulk that is cracked or failing.
- Maintain Your Finish: A healthy coat of paint or stain is your wood’s best armor. Repaint or re-stain as soon as you see signs of wear, peeling, or fading.
Protect the Classic Beauty of Your Wood Siding.
Don’t let rot compromise your home. Our experts specialize in identifying and eliminating wood rot, preserving your siding’s integrity and appearance for years to come.
Contact Us for a Free, In-Depth Wood Siding Assessment!
Frequently Asked Questions
Q1: Can I just use bleach to kill the rot fungus?
A: While bleach can kill surface fungus, it does not penetrate deep into the wood and does nothing to restore the strength of the decayed wood fibers. It is not a substitute for physically removing the rotted material and performing a proper repair.
Q2: What’s the difference between paint and stain for cedar siding?
A: Stain (especially semi-transparent stain) soaks into the wood, allowing the natural grain to show through. It is generally easier to reapply but may offer slightly less protection than paint. Paint forms a film on top of the wood, offering maximum protection against moisture and UV rays but obscuring the wood grain. The choice is a balance between aesthetics and maintenance.
Q3: How long does a professional wood siding repair take?
A: A simple epoxy repair or the replacement of a single, easily accessible board can often be completed in just a few hours. A more complex repair involving multiple boards or underlying sheathing damage could take a full day or more.
Q4: Is pressure-treated wood a good choice for repairing rotted siding?
A: No, you should not mix pressure-treated wood with your existing siding. It has a different appearance, texture, and expansion/contraction rate. The best practice is always to repair with the same wood species you are replacing—cedar for cedar, pine for pine, etc.—to ensure a consistent and durable result.


