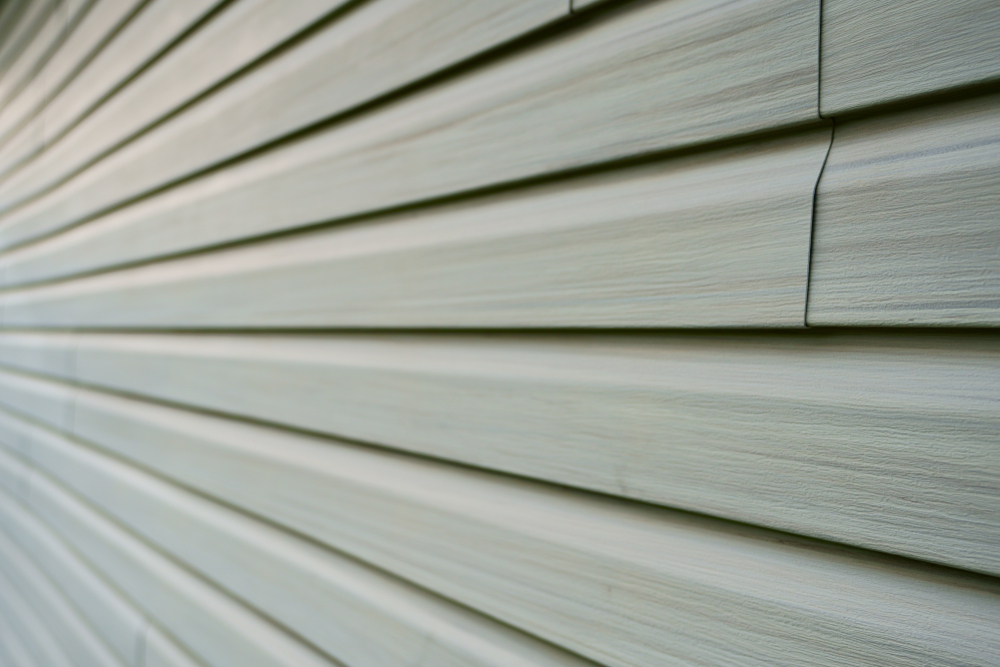
Engineered wood siding—often recognized by brand names like LP SmartSide or older iterations like hardboard—has been a staple in American home construction for decades. It promises the warm, authentic look of traditional cedar or redwood but with greater durability, uniformity, and resistance to pests. When installed and maintained correctly, it is a beautiful, high-performance cladding.
However, engineered wood is not invincible. Unlike vinyl, which is plastic, or fiber cement, which is masonry-based, engineered wood still contains wood fibers. This means it has an Achilles’ heel: moisture. If the protective paint coating fails, if the bottom edges aren’t sealed, or if it is installed too close to the ground, water can infiltrate the board.
The result? Swelling, delamination, and the dreaded “mushrooming” effect where the bottom edge puffs out and crumbles.
For homeowners in the Sacramento Valley, where wet winters alternate with baking hot summers, these issues can accelerate quickly. Ignoring a swollen board today can lead to structural rot tomorrow. In this comprehensive guide, we will explore the specific vulnerabilities of engineered wood siding, how to diagnose the severity of the damage, and the step-by-step methods for engineered wood siding repair to restore your home’s envelope.
Understanding Engineered Wood Siding
To fix it, you have to know what it is. Engineered wood siding is a composite material made from wood strands or fibers that are coated with wax, resin, and binders, then compressed under high heat to form strong, dense boards. It is then treated with zinc borate or similar compounds to resist termites and fungal decay.
The “Older Generation” Problem
It is important to distinguish between modern engineered wood (like current LP SmartSide) and older “hardboard” or masonite siding from the 1980s and 90s.
- Modern Engineered Wood: Highly water-resistant, durable, and comes with long warranties. Issues here are usually due to improper installation (bad flashing, unpainted cuts).
- Old Hardboard: This material was essentially compressed paper/cardboard. It is notorious for absorbing water like a sponge. Once it swells, it cannot be shrunk back down. It almost always requires replacement rather than repair.
Why Does It Swell?
The manufacturing process creates a very dense board, but the cut edges are porous. If water penetrates the paint film or wicks up from the bottom drip edge, the wood fibers absorb the moisture and expand. Because of the binders and resins, the fibers don’t just expand; they break their bonds. This is why you can’t just “dry it out.” Once an engineered board has swollen significantly, its internal structure is permanently altered.
Identifying Common Issues
Before you grab a hammer, take a walk around your house. Fixing wood siding rot starts with accurate detection. Look specifically at these high-risk areas:
1. The Bottom Drip Edge
Run your finger along the bottom edge of your lap siding. It should be sharp and flat.
- The Warning Sign: If the edge feels round, spongy, or is thicker than the board above it, you have moisture intrusion. This is often called “delamination” or swelling.
2. Joints and Seams
Check where two boards meet (butt joints).
- The Warning Sign: Peeling paint, peaked joints (where the ends curl outward), or dark staining indicates water is getting in between the boards.
3. Nail Heads
Look at the nails holding the siding.
- The Warning Sign: “Sunken” nail heads. If the siding has swelled around the nail, causing the nail head to look like it is buried deep in the board, the board has absorbed water. Also, look for rust streaks, which indicate the coating on the nail has failed.
4. Ground Clearance
Check where the siding meets the dirt, mulch, or concrete.
- The Warning Sign: Engineered wood requires a minimum of 6 inches of clearance from soil and 2 inches from concrete/hardscape. If your siding is buried in the dirt, it is wicking up moisture. This is a critical installation error that must be corrected.
The Repair Strategy: Patch vs. Replace
Once you have identified the damage, you have a decision to make. Can you patch it, or do you need to replace the board?
When to Patch:
- Small holes from woodpeckers or removed fixtures.
- Minor surface scratches or gouges that haven’t penetrated deep into the core.
- Very localized rot (less than an inch) on a trim piece.
When to Replace:
- Swollen edges: If the bottom edge has expanded, you cannot sand it down. The board is ruined.
- Softness: If you press on the board and it feels spongy or crumbles, the rot is internal.
- Delamination: If the layers of the board are separating.
- Widespread mold: While surface mold can be cleaned, mold growing out of the board suggests the core is wet.
Step-by-Step: Replacing a Damaged Engineered Wood Board
Replacing a single board of lap siding without damaging the surrounding wall is an art. Engineered wood is rigid, making it harder to manipulate than vinyl.
Tools Needed
- Circular saw (set to the depth of the siding)
- Pry bar / Flat bar
- Hammer
- Oscillating multi-tool (very helpful for precision cuts)
- Utility knife
- Matching engineered wood siding
- Galvanized siding nails
- High-quality exterior primer and paint
- House wrap tape
- Flashing cards (for butt joints)
Step 1: Remove the Damaged Board
This is tricky because the board is nailed at the top, and those nails are covered by the board above it.
- Cut the Board: If you are removing a section in the middle of a wall, use your circular saw to make vertical cuts on either side of the damaged area. Be careful not to cut into the board above or below.
- Rip the Center: Make a horizontal cut through the center of the damaged board. This relieves the tension and makes it easier to pry out.
- Remove the Pieces: Use your pry bar to pull the bottom half of the board off. Then, carefully work the top half out from under the board above.
- Deal with the Nails: The nails holding the top of your damaged board are still stuck in the wall, covered by the siding above. You have two choices:
- Use a hacksaw or oscillating tool to slide behind the siding and cut the nails.
- Gently lift the siding above and use a pry bar to pull the nails (risky, as you might crack the good siding). Cutting them is usually safer.
Step 2: Inspect and Prep
- Check the WRB: Look at the house wrap (weather-resistive barrier) behind the board. Is it torn? Did you cut it with your saw? Tape any holes with house wrap tape.
- Check for Rot: Poke the sheathing (OSB or plywood) with a screwdriver. If it’s soft, you have a bigger problem than just siding. You need to cut out and replace the rotten sheathing before proceeding.
- Flash the Butt Joints: If your repair creates new butt joints (where the new board meets the old), do not rely on caulk. Slide a piece of metal flashing or specialized joint flashing behind the joint.
Step 3: Install the New Board
- Measure and Cut: Measure your gap precisely. Cut your new engineered wood board to fit.
- Seal the Cuts: This is the most important step. Every time you cut engineered wood, you expose the raw core. You must prime and paint all cut edges before installing. If you skip this, the new board will fail just like the old one.
- Slide it In: Slide the new board up under the existing course above.
- Fasten: Nail the board in place.
- Blind Nailing: Ideally, nail the top of the board so the nails are covered by the course above. However, in a patch repair, you often can’t lift the board above high enough to get a hammer in.
- Face Nailing: You may have to “face nail” the new board (drive nails through the exposed bottom part). If you do this, use galvanized nails, countersink them slightly, and fill the holes with a high-quality exterior wood filler or sealant.
Step 4: Finish and Paint
- Caulk Vertical Seams: Caulk the vertical joints where the new board meets window trim or corner posts. Do not caulk the horizontal lap at the bottom; water needs to escape there.
- Paint: Apply two coats of high-quality exterior acrylic latex paint. Ensure you cover any filled nail holes.
Repairing Small Areas of Rot and Swelling
If the damage is very minor—say, a small area of swelling near a drip cap or a gouge from a falling branch—you might be able to use an epoxy wood filler system.
The Epoxy Method
- Excavate: Use a chisel or rotary tool to remove all the soft, rotten, or swollen material. You must get down to sound, hard wood.
- Harden: Apply a liquid wood hardener to the excavated area. This resin soaks into the remaining fibers and solidifies them, creating a solid base for the filler.
- Fill: Mix a two-part epoxy wood filler (like Bondo for wood or specialized architectural epoxy). Press it firmly into the hole, overfilling it slightly.
- Shape: Once it cures (usually 30 minutes), sand it flush with the surrounding profile.
- Prime and Paint: Epoxy is not UV stable. You must prime and paint it immediately to protect it.
Note: This method is only for cosmetic repairs or very small areas. It is not a structural fix. If a board is swollen along its entire length, epoxy is not the solution—replacement is.
Correcting the Root Cause: Why Did It Fail?
Simply replacing the board isn’t enough. If you don’t fix the reason it rotted, the new board will rot too. Here are the common culprits and how to fix them during your siding repair in Sacramento.
1. Lack of Kick-Out Flashing
The Problem: Where a roofline ends against a sidewall (like a garage roof meeting a second-story wall), water runs down the roof and pours directly behind the siding.
The Fix: Install a “kick-out” flashing. This small piece of metal diverts the water away from the wall and into the gutter. It is a $10 part that saves thousands in rot repair.
2. Sprinkler Overspray
The Problem: Your lawn sprinklers are hitting the house every morning. Over time, this constant wetting cycle overwhelms the paint.
The Fix: Adjust your sprinkler heads. It sounds simple, but it is the leading cause of lower-wall rot.
3. Missing “Z-Flashing” Above Windows
The Problem: The horizontal trim board above your window needs metal flashing (Z-flashing) on top of it. If this is missing, water runs behind the trim and rots the window header and the siding below.
The Fix: You may need to remove the siding board directly above the window to install proper metal flashing.
4. Dirty Gutters
The Problem: When gutters overflow, the water doesn’t just spill over the front; it often wicks back onto the fascia and soffit, eventually running down the siding.
The Fix: Clean your gutters twice a year. If you have trees, consider gutter guards.
Preventative Maintenance for Engineered Wood
Engineered wood requires more vigilance than vinyl. To get the full 30-50 year life out of it, follow this maintenance schedule:
Every Year: Inspection
Walk the perimeter. Look for those “mushroomed” bottom edges. Check for cracked caulk around windows.
Every 5-7 Years: Repainting
Paint is the primary defense for engineered wood. Do not wait until it is peeling. If the paint looks chalky or thin, it is time to recoat. A fresh coat of paint seals the surface and prevents moisture absorption.
Keep Vegetation Back
Bushes that touch the siding trap moisture against the wall and prevent it from drying out after rain. Trim all shrubs at least 12 inches away from the wall.
When to Call a Professional
While patching a small hole is DIY-friendly, engineered wood siding repair can quickly become complex. You should call a professional for siding installations in Sacramento or repairs if:
- You suspect structural damage: If you push on the wall and it moves, or if you see rot extending into the studs, this is a structural repair job, not just cosmetic.
- The damage is high up: Replacing siding on a second story requires ladders, scaffolding, and safety gear. It is not worth the risk for a homeowner.
- You have “Old Mill” or recalled siding: Some older brands of hardboard siding (specifically from the 90s) were subject to class-action lawsuits because they failed prematurely. If your whole house is failing, repairing it board-by-board is throwing good money after bad. You likely need a full re-side with modern materials.
- Mold is involved: If you uncover large areas of black mold behind the siding, stop. You need a professional who can contain the spores and remediate the area safely.
Conclusion
Engineered wood siding offers a fantastic blend of beauty and strength, but it demands respect for moisture management. Swelling and rot are not just cosmetic annoyances; they are alarm bells signaling that your home’s envelope is compromised.
By addressing these issues early—whether through precise board replacement, epoxy patching, or correcting drainage issues—you can stop the spread of rot and protect your investment.
However, if you are seeing widespread swelling, or if the maintenance is becoming a burden, it might be time to bring in the experts. At Hexteriors, we specialize in diagnosing the root causes of siding failure. We don’t just cover up the rot; we fix the water intrusion problems that caused it.
Whether you need a targeted repair to fix a few swollen boards or are ready to upgrade to a more moisture-resistant solution like fiber cement, our team is ready to help. Don’t let rot eat away at your home’s value. Visit our Siding Repair Sacramento page today to schedule an inspection and get your home back in top shape.


