For those who live in the majestic Sierra Nevada, winter is a season of profound beauty and significant challenges. A heavy blanket of snow transforms towns like Lake Tahoe, Truckee, and Grass Valley into picturesque landscapes. But that same snow, along with the ice and harsh freeze-thaw cycles that accompany it, wages a relentless war on your home’s exterior.
When winter storms pile feet of snow against your walls and massive icicles hang from your eaves, the damage can be severe. Water from melting snow can get trapped behind siding, leading to rot. Ice dams can force moisture up under rooflines and into wall cavities. The sheer weight of snow can compromise materials, while temperature swings cause cracking and splitting. This isn’t just cosmetic wear and tear; it’s a direct assault on your home’s structural integrity and your family’s safety.
This guide is for every Sierra homeowner who has ever worried about their home surviving another harsh winter. We will break down exactly how snow and ice damage your siding and windows, provide a checklist for immediate action, and detail the modern, cold-climate building strategies and materials required to create a durable, weather-tight exterior that can stand up to the toughest mountain winters.
The Mountain’s Assault: What Happens to Your Exterior in a Sierra Winter
Snow and ice damage your home through a combination of weight, moisture, and temperature extremes. Understanding these forces is the first step toward building a proper defense.
The Silent Destroyer: Ice Dams
Ice dams are thick ridges of ice that form at the edge of a roof, preventing melting snow from draining properly. They are caused by a warm attic, which melts the underside of the snowpack on the roof. This water runs down to the cold eaves, where it refreezes, forming a dam. As more water pools behind this dam, it has nowhere to go but up—under the shingles and, critically, behind the siding where the roof meets the wall.
This backup of water leads to:
- Saturated Walls: Water soaks the roof decking, sheathing, and wall framing, creating a perfect environment for rot.
- Compromised Siding: The siding itself becomes saturated, leading to delamination, paint failure, and decay.
- Interior Damage: Water can leak into your attic and down your interior walls, destroying insulation, drywall, and creating serious mold problems.
The Power of Expansion: Freeze-Thaw Cycles
The Sierra Nevada is famous for its dramatic temperature swings. A sunny winter day can melt snow, and the subsequent freezing night turns that moisture into ice. This cycle is incredibly destructive to building materials.
- Cracking and Splitting: When water seeps into small cracks or pores in siding (especially wood or lower-quality composites) and then freezes, it expands with immense force. This process, repeated over and over, can split panels, break apart seams, and destroy the material from the inside out.
- Fastener Failure: The expansion and contraction of materials can “jack” nails and fasteners loose over time, weakening the siding’s grip on the wall and creating entry points for more moisture.
Trapped Moisture and Rot from Snow Buildup
Heavy snowfall often results in deep snowdrifts piling up against the lower portions of your home’s walls. This creates a constant source of moisture as the snow slowly melts.
- Saturated Siding and Sheathing: If siding is installed too close to the ground or a deck, it will sit in this wet snow for months. This constant saturation wicks moisture up into the siding and the structural sheathing behind it.
- Accelerated Rot and Decay: This is a death sentence for wood-based materials. The constant moisture provides an ideal breeding ground for dry rot and other wood-destroying fungi, which can silently consume your home’s structure.
Repair or Replace? Why Winter Damage Requires a Full System Approach
After a winter of heavy snow, you might notice a few cracked siding panels or some peeling paint and think a simple repair will suffice. In a high-altitude environment, this approach is almost always a mistake that masks a much larger problem.
The Pitfalls of a “Patch-Up” Job
- Ignoring Hidden Damage: Replacing one or two cracked boards does nothing to address the potentially rotted sheathing or wet insulation behind them. A patch job simply traps the moisture, guaranteeing that the decay will continue and worsen.
- Material Mismatch: It is nearly impossible to match the color and weathered texture of existing siding. A repair will look like an obvious patch, diminishing your home’s curb appeal and value.
- System Failure: Your home’s exterior is a complete system. Patching one component doesn’t restore the integrity of the weather-resistant barrier or the flashing, leaving you vulnerable to future leaks.
The Case for a Full Cold-Climate Replacement
A full siding and window replacement is the only way to correctly address winter damage and fortify your home against future storms. This process allows a professional mountain contractor to:
- Perform a Full Structural Inspection: By removing all the old siding, we can thoroughly inspect the sheathing and framing for any signs of rot or water damage, replacing any compromised lumber to restore structural integrity.
- Install a Modern Water Management System: This is the most critical step. It involves installing a new, high-performance weather-resistant barrier, a rainscreen air gap, and a robust flashing system designed for snow and ice.
- Upgrade to Cold-Climate Materials: You have the opportunity to replace failed materials with siding and windows specifically engineered to perform in high-altitude, freeze-thaw environments.
- Guarantee Long-Term Performance: A complete, professional installation comes with a comprehensive workmanship warranty, giving you peace of mind that your home is protected.
Immediate Winter Triage: A Post-Storm Checklist
If you suspect your home has suffered damage during a winter storm, follow these steps.
- Prioritize Safety: Be extremely cautious of falling snow or ice from your roof. Do not stand directly under eaves loaded with snow. Be aware of slippery, icy surfaces around your property.
- Document from a Safe Distance: Use a camera with a zoom lens to take photos of any visible damage, such as ice dams, large icicles forming behind gutters, or cracked and missing siding panels. Document the dates and the weather conditions.
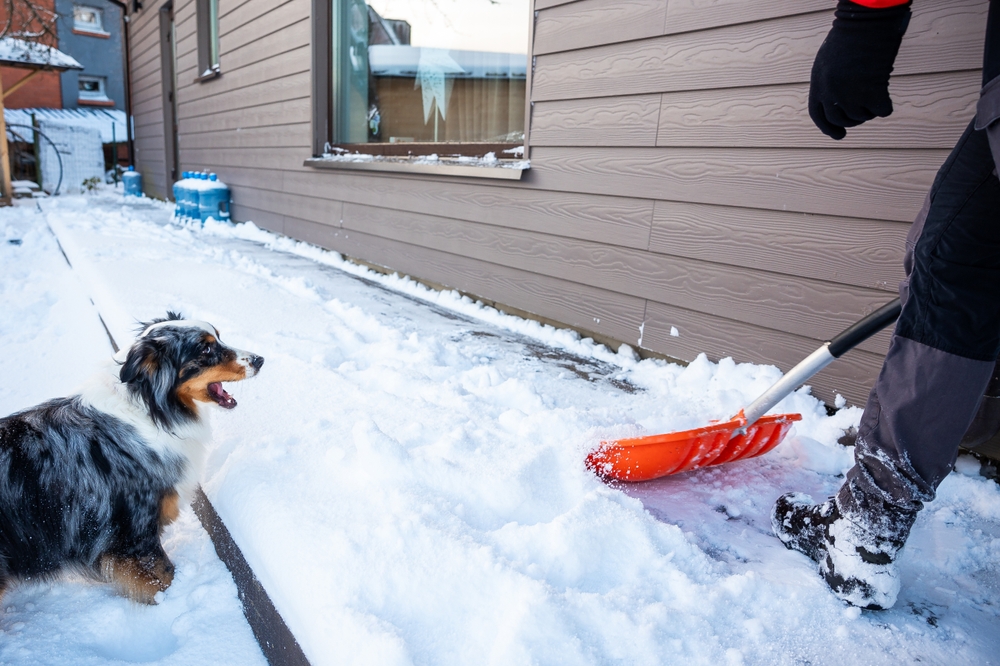
- Clear Heavy Snow from Walls (Carefully): If deep snow is piled against your siding, carefully shovel it back at least 1-2 feet from the wall. Be extremely careful not to strike or damage the siding with the shovel. This helps the wall dry out.
- Look for Interior Signs: Check inside your home for signs of water intrusion. Look for water stains on ceilings near exterior walls, dampness around window and door frames, or peeling paint.
- Emergency Protection: If a section of siding has come completely off, exposing the sheathing, you may need to have it temporarily covered with a tarp to prevent further water damage. Do not attempt this yourself in icy or unsafe conditions; call a professional.
- Contact Your Insurance Agent: Report the potential damage. They will explain the process for filing a claim related to snow load or ice dams.
- Schedule a Professional Inspection: Contact a contractor like Heritage Exteriors who specializes in mountain construction. We have the expertise to safely inspect your roofline and walls, identify the root cause of the problem (like poor attic insulation causing ice dams), and provide a detailed scope of work for your insurance claim.
The Science of a Sierra-Proof Wall: Cold-Climate Building Practices
Building in the mountains is different. It requires a deep understanding of how to manage extreme cold, massive snow loads, and constant moisture. A modern, resilient wall system is built on these principles:
A Breathable, Draining, and Ventilated System
The core philosophy is to assume that some moisture will eventually get behind your siding and to give it an easy way to get out.
- High-Permeability Weather-Resistant Barrier (WRB): We wrap the home in an advanced house wrap that blocks liquid water but allows water vapor (humidity) to pass through. This lets the wall “breathe” and dry out from the inside.
- Rainscreen Air Gap: This is non-negotiable in a snowy climate. We install the siding on a framework of vertical furring strips, creating an air gap behind it. This gap acts as a drainage plane for melting snow and a ventilation channel that constantly dries the back of the siding and the wall, dramatically reducing rot potential.
- Vented Assembly: The rainscreen gap is left open at the bottom (screened to keep out pests) and top to promote continuous airflow through convection, actively pulling moisture out of the system.
Bulletproof Flashing for Snow and Ice
- Kick-Out Flashing: This L-shaped piece of metal installed where a roofline meets a wall is the single most important defense against water intrusion at this critical junction. It forcefully directs water away from the wall and into the gutter, preventing it from running down behind the siding.
- Proper Clearances: Siding must be installed with at least 2 inches of clearance from any roof surface and 6-8 inches from the ground or deck surface. This keeps the siding out of direct contact with sitting snow and splash-back.
- Robust Window & Door Flashing: We use multi-layered flashing systems, including sill pans under every unit, to create a waterproof envelope around all openings.
Cold-Weather Installation Protocols
Installing siding in the winter requires specific expertise. Materials contract in the cold, and sealants can fail if applied at the wrong temperature. Our crews are trained to follow cold-weather best practices, such as using the correct expansion/contraction gaps for materials and using low-temperature-rated sealants to ensure a durable installation, even in winter.
Material Showdown: Siding and Windows for Mountain Homes
Siding: What Survives the Sierra?
- Fiber Cement (e.g., James Hardie): Top Recommendation. Fiber cement is impervious to water, so it won’t rot or decay from melting snow. Its stability in freeze-thaw cycles prevents cracking, and its rigidity helps it withstand snow loads.
- Engineered Wood (e.g., LP SmartSide): A very strong contender. It is treated to resist moisture and fungal decay and has excellent impact resistance from falling ice or branches. When installed in a rainscreen system, it is a durable and beautiful choice for mountain homes.
- Premium Metal Systems: High-quality steel siding is an excellent option. It sheds snow easily, is impervious to water, and is extremely durable.
- Traditional Wood: A high-maintenance choice. It requires impeccable and frequent sealing (every 1-3 years) to prevent it from absorbing moisture, cracking, and rotting. Without this commitment, it will fail quickly in a mountain environment.
- Vinyl Siding: Poor Choice for Cold Climates. Vinyl becomes extremely brittle in freezing temperatures and can easily crack from the slightest impact, like a bump from a snow shovel or falling icicle.
Windows: The View from High Altitude
Windows in the mountains face unique challenges from snow load, temperature swings, and UV radiation.
- Fiberglass Frames: The best choice for mountain homes. Fiberglass has a very low rate of thermal expansion and contraction, meaning it stays stable and sealed against the glass through extreme temperature swings. It is also incredibly strong and can handle heavy snow loads.
- Dual or Triple-Pane Glass: Essential for insulation against the cold.
- Capillary Tubes: A must-have for insulated glass units (IGUs) installed at high altitudes. These tiny tubes allow the pressure inside the sealed unit to equalize with the outside air pressure, preventing the seals from blowing out.
- Low-E Coatings Tuned for Altitude: Special Low-E coatings are designed to block the intense high-altitude UV rays while still allowing for passive solar heat gain in the winter, helping to warm your home.
- Robust Flashing and Sill Pans: The best window in the world will fail if not installed correctly. A waterproof sill pan beneath the window is a critical failsafe to drain any incidental leaks to the outside.
Navigating Insurance and Costs for Winter Damage
Insurance Claims for Snow and Ice
- Documentation is Paramount: Detailed photos of the ice dams, snow load, and resulting damage are your most powerful tools.
- Identify the “Peril”: Your policy may cover damage from the “weight of ice and snow” or from “ice dams.” Understand your specific coverage.
- Root Cause Analysis: A professional contractor’s report explaining that the damage was caused by a covered event (like an ice dam) is crucial. Insurance may also investigate whether the ice dams were a result of pre-existing issues like poor attic insulation, which could affect your claim.
The Cost of a Mountain-Ready Exterior
Due to the robust materials, advanced building techniques, and skilled labor required, building in the mountains is more expensive.
- Cost Range: A full siding replacement with a high-performance, cold-climate system can range from [Typical price range, e.g., $20 to $40+ per square foot]. Windows with high-altitude features will also be a premium investment.
- Value Proposition: This is not just a repair; it is an investment in preventing catastrophic future damage. The cost of a proper exterior restoration is far less than the cost of repairing rotted structural framing or dealing with a major interior mold problem.
Case Examples: Real-World Sierra Scenarios
- The Truckee Ice Dam Disaster: A homeowner discovered water stains on their ceiling after a heavy snow season. Our inspection revealed massive ice dams had forced water behind the wood siding, rotting out a 10-foot section of the wall sheathing. The solution involved a full siding replacement with a James Hardie rainscreen system and working with an insulation contractor to properly air-seal and insulate the attic to prevent future ice dams.
- The Grass Valley Freeze-Thaw Failure: An older home with composite siding was showing extensive cracking and delamination after several winters. The freeze-thaw cycles had destroyed the material. We replaced it with durable LP SmartSide, ensuring proper clearances from the ground and roof to prevent moisture wicking from snow.
A Proactive Approach: Winterization and Maintenance
- Win the Ice Dam Battle in the Attic: The best way to prevent ice dams is to keep your attic cold. This means air-sealing any gaps between the living space and the attic and ensuring you have adequate, properly vented insulation on the attic floor.
- Heat Cables (Use Sparingly): In some persistent problem areas, zigzag heat cables installed along the eaves can help maintain a channel for water to drain. However, this is a patch, not a solution to the root cause.
- Gutter Maintenance: Keep gutters clean and free of debris before winter arrives so melting snow can drain freely.
- Manage Snow Around Your Home: After a heavy storm, take time to carefully remove deep snowdrifts from against your walls to allow the siding to dry.
Build for the Mountains. Build to Last.
Living in the Sierra Nevada means embracing the elements, but it doesn’t mean surrendering your home to them. With modern building science and the right materials, you can create an exterior that is not only beautiful but also engineered to withstand the harshest winters for decades to come.
Don’t let another winter pass worrying about ice dams and rot. If you see signs of winter damage on your home, it’s a warning sign that should not be ignored. The team at Heritage Exteriors are cold-climate construction specialists. We understand the unique demands of building in Tahoe, Truckee, and the surrounding mountain communities. We provide thorough inspections, detailed recommendations, and expert installation of siding and window systems designed to protect your home and your peace of mind.
Before the snow flies again, ensure your home is ready. Call Heritage Exteriors today at 916-340-8998 for a free, no-obligation cold-climate readiness inspection and quote.
Disclaimer: Heritage Exteriors is a licensed exterior remodeling contractor (CSLB Lic. #1055919). We are experts in building envelope science for cold climates. While we can identify the causes of ice dams, we recommend working with a qualified insulation and roofing contractor to address attic and roof issues. Homeowners should consult directly with their insurance provider regarding specific policy coverage.


