Aluminum siding was the darling of the post-war housing boom. For decades, it was the go-to choice for homeowners who wanted a durable, fire-resistant, and low-maintenance alternative to wood. While modern materials like fiber cement and vinyl have largely overtaken it in new construction, thousands of homes in Sacramento and the Bay Area still proudly wear their original metal armor.
And for good reason—metal siding is incredibly tough. It doesn’t rot, insects hate it, and it can last for 40 years or more if painted properly. However, metal has one significant weakness: it dents. A wayward baseball, a heavy hailstorm, or a carelessly leaned ladder can leave a permanent impression on your home’s exterior. Unlike wood or fiber cement which might crack, aluminum deforms, leaving an unsightly dimple that ruins the smooth lines of your house.
Furthermore, weather damage over decades—chalking paint, oxidation, and scratches—can make even the sturdiest metal siding look tired.
The good news is that aluminum siding repair is often more manageable than you might think. You don’t always need to re-side the whole house to fix a few blemishes. In this comprehensive guide, we will walk you through the specific challenges of metal siding and provide actionable steps to repair dents, fix scratches, and restore the luster of your home’s exterior.
The Unique Characteristics of Metal Siding
Before picking up a tool, it helps to understand what you are working with. Aluminum and steel siding are essentially thin sheets of metal stamped into a profile (usually mimicking wood lap siding) and coated with a baked-on enamel finish.
Why It Dents
Because the metal sheets are relatively thin to keep them lightweight and affordable, they have little structural memory. When an object strikes vinyl, the plastic often flexes and bounces back. When something strikes aluminum, the metal stretches at the point of impact. This stretch is permanent. You can’t just “rub it out” like a smudge; you have to physically reshape the metal or hide the damage.
Oxidation and Chalking
Have you ever brushed against an old metal-sided house and come away with white powder on your clothes? That is oxidation. Over time, the paint finish on aluminum breaks down due to UV exposure, creating a chalky residue. This isn’t just a cosmetic issue; it means the metal below is losing its protective layer.
Thermal Movement
Metal conducts heat efficiently. It expands and contracts significantly with temperature changes. This movement creates a “pinging” or “popping” noise that many homeowners are familiar with. It also means that any patch or repair material you use must be flexible enough to handle this movement, or it will crack and fall out within a season.
Assessing the Damage: Repair or Replace?
Not all damage is created equal. Before you commit to a repair method, evaluate the severity of the issue.
Minor Dents and Dings
Small, shallow dents (like those from hail or gravel thrown by a lawnmower) can often be repaired without removing the siding. Techniques involving auto body filler or even simple heat-and-cold therapy can work wonders here.
Deep Creases and Punctures
If the metal is torn, punctured, or creased sharply, cosmetic surface repairs usually won’t hold up. The structural integrity of the panel is compromised. In these cases, you are looking at replacing the affected section or the entire panel.
Widespread Weather Damage
If an entire wall looks battered, faded, and dented, spot repairs will result in a polka-dot effect. The fresh paint on the repairs will never perfectly match the faded oxidation of the old siding. In this scenario, you might be better off painting the entire house or considering professional siding repair in Sacramento to replace the affected wall entirely.
Method 1: The Heat-and-Cold Trick for Small Dents
For very shallow, smooth dents without creases (the kind that look like a thumb pressed into clay), you might be able to pop the metal back into shape using physics. This method uses the rapid expansion and contraction of metal to snap it back to its original form.
Tools Needed:
- Heat gun (or a powerful hair dryer)
- Compressed air duster (canned air)
- Heavy duty work gloves
The Process:
- Clean the Area: Wash the dented area with soap and water to remove dirt and oxidation. Let it dry.
- Apply Heat: Use the heat gun on a medium setting. Hold it about 4-6 inches away from the dent and move it in a circular motion. You want to heat the metal thoroughly but be careful not to blister or bubble the paint. Do this for about 30-60 seconds.
- Apply Cold: Immediately grab the can of compressed air. Turn the can upside down (this is crucial) and spray the liquid propellant directly onto the heated dent. The liquid is freezing cold.
- Listen for the Pop: The sudden thermal shock causes the metal to contract rapidly. Often, this contraction will pull the stretched metal back into alignment with a distinct “pop.”
- Repeat if Necessary: You might need to try this 2-3 times. If it doesn’t work after a few attempts, the metal is likely stretched too far, and you will need to move to a filler method.
Note: This works best on steel siding. Aluminum is softer and stretches more easily, so it may not respond as well as steel, but it is worth a try as a non-invasive first step.
Method 2: Patching Dents with Auto Body Filler
For deeper dents, creases, or metal siding dents that didn’t respond to the heat method, the most effective repair is similar to fixing a dent in a car fender. You fill the depression, sand it smooth, and paint it.
Tools Needed:
- Two-part auto body filler (like Bondo)
- Coarse and fine grit sandpaper (80, 120, and 220 grit)
- Plastic putty knife
- Primer suitable for metal
- Exterior paint color-matched to your siding
- Self-tapping screw and pliers (optional, for pulling deep dents)
The Process:
- Prep the Surface: You must remove the paint down to the bare metal in the dent and about an inch surrounding it. Use the 80-grit sandpaper for this. The filler needs rough, bare metal to bond to. If you leave paint, the filler will fall off.
- Pull Deep Dents (Optional): If the dent is very deep, drilling a small pilot hole in the center, inserting a screw halfway, and pulling on the screw head with pliers can help bring the metal closer to level. This means you need less filler, which is stronger.
- Mix the Filler: Follow the instructions on the auto body filler can. Mix the resin and the hardener on a disposable surface until it is a uniform color. You have limited working time, so move quickly.
- Apply the Filler: Use the plastic putty knife to press the filler firmly into the dent. Overfill it slightly, as you will sand it down. Smooth out the edges to feather it into the surrounding siding.
- Sand It Smooth: Once the filler has cured (usually 20-30 minutes), start sanding.
- Start with 80-grit to knock down the high spots.
- Switch to 120-grit to shape the contour perfectly to the siding profile.
- Finish with 220-grit to make it glass-smooth.
- Check Your Work: Run your hand over the repair. Your fingers can feel bumps your eyes can’t see. If it feels uneven, add a thin “glazing putty” layer and sand again.
- Prime and Paint: You must prime the bare metal and the filler immediately to prevent rust or moisture issues. Apply two coats of high-quality exterior acrylic latex paint.
Pro Tip: The texture of the filler will be perfectly smooth, while your siding might have a wood-grain texture. To hide the repair, you can dab the wet paint with a sponge or use a texturing spray to mimic the grain before the final coat dries.
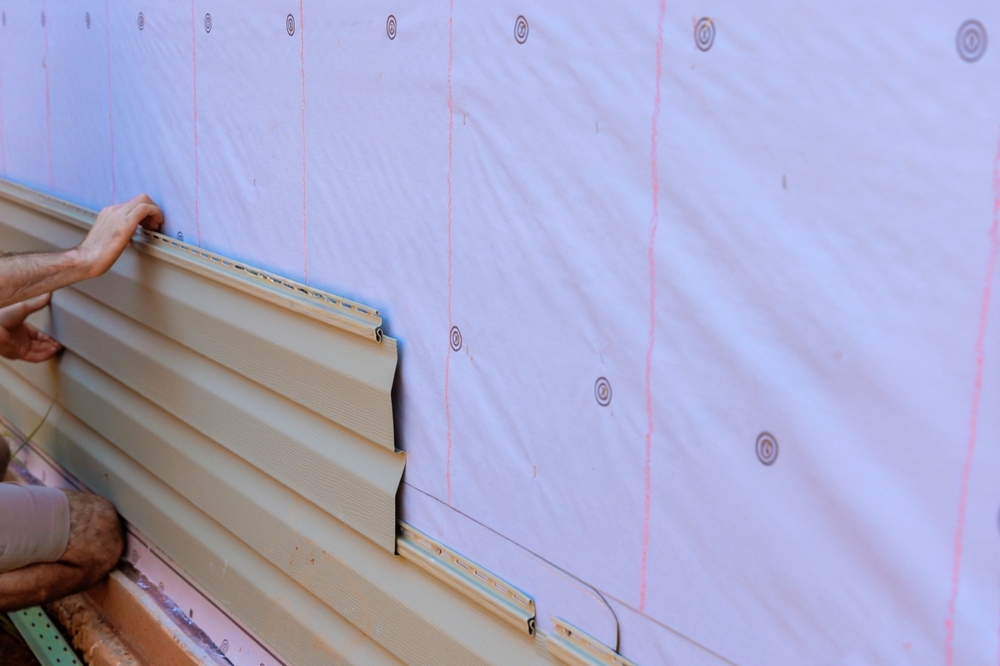
Method 3: Replacing a Single Panel
Sometimes, the damage is too severe for filler. A large tear, a crushed corner, or a massive dent requires replacing the panel. This is more involved than vinyl repair because metal siding panels are often interlocked tightly.
Tools Needed:
- Replacement aluminum panel (matching profile is critical)
- Utility knife
- Tin snips
- Zip tool (siding removal tool)
- Pry bar
- Hammer
- Caulk gun and gutter seal/sealant
- Heavy gloves (metal edges are razor sharp)
Finding a Match:
This is the hardest part of aluminum siding repair. Aluminum profiles vary by manufacturer and decade. You may need to take a piece of your siding to a specialized building supply distributor. If you cannot find a match, consider harvesting a piece from the back of a garage or high up on a gable end where mismatched replacement siding won’t be noticed, and use that harvested piece for the visible repair.
The Process:
- Cut the Old Panel: Unlike vinyl, you can’t always just “unzip” the panel above because the paint seals them together over time. You often have to cut the damaged panel out.
- Score the center of the damaged panel horizontally with a sharp utility knife.
- Cut through the panel carefully, avoiding the panel underneath.
- Remove the bottom half of the panel first to expose the nailing hem of the panel below (though you won’t need to touch that).
- Then work on the top half to expose the nails holding the damaged panel.
- Remove the Nails: Use a pry bar to gently pull the nails holding the remaining strip of the damaged panel. If they are stubborn, you can cut the nail heads off.
- Prepare the Replacement: Cut your new panel to length. Remember to leave room for expansion—metal moves!
- Cut the Nailing Hem (The “Glued” Approach): Because you likely cannot lift the panel above high enough to nail the new panel in place properly, the standard repair involves cutting off the top nailing hem of your replacement panel.
- You will essentially be gluing and tucking the new panel in, rather than nailing it.
- Install the New Panel:
- Apply a generous bead of high-quality construction adhesive or gutter seal along the top edge of the board below the gap.
- Apply adhesive to the back of the new panel’s top edge.
- Lock the bottom of the new panel onto the bottom lock of the existing siding.
- Push the top of the new panel up under the existing siding above.
- Press firmly to seat the adhesive.
- Brace It: You need the adhesive to bond while the panel stays flat. Use a board to press against the panel and lean a heavy object (like a ladder or 2x4s) against it to hold constant pressure for at least 24 hours.
Dealing with Weather Damage: Oxidation and Scratches
If your siding isn’t dented but looks chalky, dull, or scratched, you don’t need repairs—you need restoration.
Fixing Scratches
If a branch scratched your paint down to the bare metal:
- Clean: Scrub the scratch with a scour pad and detergent.
- Feather: Lightly sand the edges of the scratch so the paint doesn’t flake.
- Touch Up: Use an artist’s brush and matching paint. Do not brush back and forth; dab the paint into the scratch. This fills the void and helps it blend. Avoid spray paint unless you mask off a huge area, as overspray will look terrible.
Removing Oxidation
To remove that chalky white powder and restore color:
- Wash: Use a siding cleaner specifically formulated for oxidation removal. Typical pressure washing often isn’t enough and can stripe the oxidation, making it look worse.
- Scrub: You usually need to use a soft-bristle brush on an extension pole to physically agitate the surface.
- Rinse: Rinse thoroughly from the top down.
- Seal (Optional): There are clear coat products available for aluminum siding that restore the sheen and protect the paint, much like waxing a car.
Painting Metal Siding: The Ultimate Refresh
If repairs are extensive, painting is the best way to unify the look of the home. Metal siding takes paint beautifully if prepped right.
- Clean: All mildew and chalk must be gone.
- Prime: Use a primer specifically designed for metal surfaces if any bare metal is exposed. If the old paint is intact, a high-quality 100% acrylic latex paint can often go directly over it.
- Paint: Acrylic latex is best because it is flexible. As the metal expands and contracts, the paint stretches with it. Oil-based paints are too brittle and will crack.
When Is It Time to Call a Professional?
While patching a dent is a solid DIY project, there are times when you should call in the experts for siding installation in Sacramento.
1. Structural Damage
If a vehicle hit your house, the damage likely goes beyond the siding. You could have broken studs, damaged sheathing, or compromised shear walls. A professional contractor can open up the wall, assess the structural framing, and repair the envelope properly.
2. Water Intrusion
If you see rust stains coming from behind the siding, or if interior drywall is damp near a dented area, water has breached the barrier. Surface repairs won’t fix a leak. You need a pro to remove the siding, fix the flashing and house wrap, and reinstall.
3. Lack of Materials
If you cannot find a matching panel, a professional siding company often has deeper networks of suppliers or can fabricate custom metal flashing and trim to hide transitions if you decide to switch materials on just one wall.
4. Safety
Working with metal siding involves sharp edges and ladders. If the damage is on the second story or near power lines, do not risk your safety. Pros have the scaffolding, brakes, and safety gear to do the job without injury.
Conclusion
Aluminum siding is a testament to the durability of American housing materials. With a little care, it can continue to protect your home for decades. Whether you are using a heat gun to pop out a hail dent, applying body filler to smooth out a crease, or replacing a panel, maintaining your metal siding preserves your home’s value and curb appeal.
However, metal isn’t invincible. When weather damage becomes extensive or accidents compromise the structure of your walls, Hexteriors is here to help. We specialize in diagnosing exterior issues and providing honest recommendations—whether that is a targeted repair or a modern upgrade.
If your aluminum siding has seen better days, or if you are ready to explore replacing old metal with modern, dent-resistant options like fiber cement, contact us today. Let’s get your home looking its best again.
For expert advice and estimates, visit our Siding Repair Sacramento page or give us a call.


